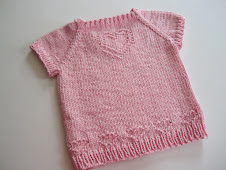
Updated patterns!

I'm in the process of updating my old patterns, particularly the bibs, to include charts. I'm rewriting some of the directions to make the patterns even easier and including alternative methods for beginning the bibs and for making the ties. Look for these patterns in the sidebar to see which ones have been added. It's a slow process, but eventually, they'll all be there!


Wednesday, January 26, 2011

Whoo Gives a Hoot?

I'm been on a mitten kick lately.  I will confess that mittens are my most favorite things to knit.  Especially little ones!  I had this idea pop into my head for a pair of owl mittens.  As I've told you before, my oldest grandson is really into birds and I thought these might be fun to make.
They were pretty easy, although there is some sewing involved and a little crocheting (not my strong suit!).  You can take any mitten pattern that you like and convert them into owls.  Here's how you do it!  Knit your mitten until the length reaches a little past the top of the fingers.  You do not decrease as you normally would do.  To finish the top of the mitten, you will divide your stitches evenly.  For the first mitten, knit across the first half of your stitches.  When you get to the second half, knit into the front and back of each stitch, so you have twice as many stitches.  Here's a picture that shows the first half on the front needle and the second half, with twice as many stitches on the back needle:
The next step is a little fiddly, but only because you're using three needles. I highly recommend that you use bamboo needles so the stitches won't slide as much. Slip the first stitch onto a spare needle and hold in front.  Slip the next stitch onto a second spare needle and hold in back.  Now slip the next stitch onto the front needle and the next stitch onto the back needle.  Keep doing this until you have half the stitches on each needle.
You now have three needles.  The first needle (on bottom) holds the first half of your stitches.  The second needle (the middle) holds half of the increased stitches.  The third needle (top) holds the second half of the increased stitches.  All three needles should now have the exact same number of stitches.
At this point, I suggest that you move the top stitches to a piece of waste yarn.  Now, you graft the stitches from the middle and the front needles together, using the kitchener stitch.  After the stitches have been grafted, go back and pick up the stitches you placed on the waste yarn.  You will now knit the piece of the forehead that comes down between the eyes.  Carefully join your yarn and knit across the stitches.  Knit three more rows.  The front of the mitten should now be facing you.  Begin the decreases.  Slip the first stitch as if to knit, knit the second stitch and then pass the first stitch over the one you just knit.  (ssk or psso).  Knit until the last two stitches and then knit these together.  (k2tog).  Knit the next row.  Second decrease:  ssk, ssk, then knit until you have 4 stitches remaining.  k2tog twice.  You've just decreased 2 stitches at the beginning and at the end of the row.  Knit the next row.  Third and subsequent decreases:  ssk, knit until last 2 stitches, k2tog.  Next row:  knit.  Repeat these last two rows until you have 2 stitches remaining.  K2tog and cut your yarn leaving a long tail for sewing the point down.
Next come the eyes.  I crocheted two circles.  You don't want your eyes to be huge (or maybe you do!), so you might have to play around to get them the size you want.  Crocheting is not "my thing", so if you have an easier way to do this, go for it.  Next, you need to crochet two smaller circles for the inside of the eyes.
Sew the black circle on top of the yellow circle to make the eyes.  I added a little white french knot for the pupil.  Now sew the eyes onto the mitten.  I suggest the you bring the eyebrow flap down to make sure you have them where you want them.  To sew them, I just used the tail from the yellow circle and did a running stitch around the perimeter. 
Now thread your needle through the long tail of the eyebrow flap and tack it down.  You don't have to sew it down completely, just put a few stitches along each side to anchor it.  Also, if you roll up the cuff, it makes it easier to sew!
I embroidered a beak after the flap was sewn down.  It doesn't show up as nicely as I'd like it to in these pictures, but it is there!  Now, instant owls!  You just need to go ahead and finish up the thumbs according to your pattern. 
 Remember, when you do the second owl, you'll need to reverse the graft, so you'll have right and left mitts.
I used Cascade 220 and a U.S. Size 4 for my mittens.  Try to use wool so those little fingers will stay toasty.  The cold just goes right through acrylic!

Copyright 2011 by Elaine Fitzpatrick.  No part of these instructions or pictures may be used or reproduced except for your own personal use.  Items made with these instructions are for your own personal use and are not to be sold unless you have express permission from the designer.

Saturday, January 22, 2011

Polar Bears

Baby, it's cold outside.  At least it is here in New England, so no wonder Polar Bears are making their way down South!  Tonight, it's supposed to go down to ten below zero.  Brrrr...  In any event, I hope you enjoyed knitting along and aren't disappointed in the mystery design, now that it's been revealed.   
I've added the patterns in pdf format for both the bib and the cloth in the sidebar.  I know "Polar Bear" is kind of lame for a name, but it is what it is!  ;o)
If you're on Ravelry, you should check out my friend, Tim, and his project page.  He uses the Ravelry name "oylenshepeegul" (someday I have to find out what the heck that means).  In any event, he's posted pictures of his daily progress of the cloth.  He knitted his out of a neon green and he did a great job, as always!  You should check it out.  I'm off to add the pattern to Ravelry's database, so if you've knitted along, be sure to post your projects so I can check out the pictures!

Friday, January 21, 2011

Mystery KAL - Day Six - Last Day!

So now we've reached the end.  I hope you all enjoyed knitting along and I really hope that you all listened and used a solid color.  ;o) ( If you didn't, I guarantee you'll have trouble seeing the design.)  Tomorrow, I'll post my pictures and put the file up in a pdf format for you. 

Cloth Day Six:
Row 51:  (k1, p1) x5; k17; (p1, k1) x5.
Rows 52 - 58:  k1, p1 across row.
Bind off in k1, p1 and weave in ends.

Bib Day Six:
Row 53:  (k1, p1) x4; k21; (p1, k1) x4.
Row 54:  (k1, p1) x4; k1; p7; k1; p11; k1; (p1, k1) x4.
Row 55:  (k1, p1) x5; k17; (p1, k1) x5.
Rows 56 - 62:  k1, p1 across row.
Row 63:   k1, p1 for 13 sts.  Slip sts. just worked onto stitch holder, bind off the next 11 stitches knitwise; work across remaining sts. in established pattern: 13 stitches each side.

NECK AND SHOULDER SHAPING – LEFT SHOULDER
Note: As you look at the bib with the right side facing, the first shoulder worked will be the left side. All the decreases are made on right side or odd numbered rows.

Row 64:  (wrong side) k1, p1 across row.

Neck decreases:
Row 65:   Slip 1 knitwise, k1, psso; k1, p1 across row. (12 sts.)
Row 66:  k1, p1 across row.
Row 67:   Slip 1 knitwise, k1, psso; p1, k1 across row. (11 sts.)
Row 68:  k1, p1 across row.

Shoulder decreases:
Row 69:  k1, p1 across to last 2 sts, p2tog.  (10 sts.)
Row 70:  p1, k1 across row.
Row 71:  k1, p1 across to last 2 sts., k2tog.  (9 sts.)
Row 72:  k1, p1 across row.
Row 73:  k1, p1 across to last 2 sts., p2tog.  (8 sts.)
Row 74:  p1, k1 across row.
Row 75:  k1, p1 across to last 2 sts., k2tog.  (7 sts.)
Row 76:  k1, p1 across row.
Row 77:  k1, p1 across to last 2 sts., p2tog.  (6 sts.)
Row 78:  p1, k1 across row.
Row 79:  k1, p1 across to last 2 sts., k2tog.  (5 sts.)
Row 80:  k1, p1 across row.
Row 81:  Slip 1 knitwise, k1, psso; k1, p2 tog.  (3 sts.)

For the crocheted ties, slip your crochet hook through the three stitches and draw your yarn through.  Then work a chain for about 12 - 14 inches.  The crocheted ties are not as stretchy as the knitted ones, so you might want to make these slightly longer.  When you reach the desired length, work back on the chain by inserting your hook in the second chain stitch nearest the end and slip stitch in each chain until you are back to the beginning.  Fasten the yarn securely and weave in the ends.  I have a “mini-tutorial” for making the crocheted ties on my blog.  http://downcloverlaine.blogspot.com/2010/05/ties-that-bind.html

For the knitted ties, slip these 3 sts. to a dpn work an I-cord for approximately 12 inches.  Fasten off and run end down through middle of I-cord.  Don't worry if the
I-cords look a little wonky.  A firm tug will usually straighten them out and after the bib is washed, you won't even notice!  A good tutorial for making the I-cords can be found here:  http://www.knittinghelp.com/videos/knitting-tips


NECK AND SHOULDER SHAPING – RIGHT SHOULDER
With wrong side facing, slip sts. from stitch holder to left needle and join yarn at neck edge.  All the decreases are made on right side or odd numbered rows.

 Row 64:  (wrong side) k1, p1 across row.

Neck decreases:
Row 65:  k1, p1 across to last 2 sts., p2tog.  (12 sts.)
Row 66:  p1, k1 across row.
Row 67:  k1, p1 across to last 2 sts., k2tog.  (11 sts.)
Row 68:  k1, p1 across row.

Shoulder decreases:
Row 69:  Slip 1 knitwise, k1, psso; k1, p1 across row.  (10 sts.)
Row 70:  k1, p1 across row.
Row 71:  Slip 1 knitwise, k1, psso; p1, k1 across row.  (9 sts.)
Row 72:  k1, p1 across row.
Row 73:  Slip 1 knitwise, k1, psso; k1, p1 across row.  (8 sts.)
Row 74:  k1, p1 across row.
Row 75:  Slip 1 knitwise, k1, psso; p1, k1 across row.  (7 sts.)
Row 76:  k1, p1 across row.
Row 77:  Slip 1 knitwise, k1, psso; k1, p1 across row.  (6 sts.)
Row 78:  k1, p1 across row.
Row 79:  Slip 1 knitwise, k1, psso;  p1, k1 across row.  (5 sts.)
Row 80:  k1, p1 across row.
Row 81:  Slip 1 knitwise, k1, psso; k1; p2tog.  (3 sts.)

Work tie to correspond with the one you worked for the other side.

Weave in ends.

Thursday, January 20, 2011

Mystery KAL - Day Five

So, by now I'm guessing that you've all solved the "mystery", but are still playing along.  Hope you're having fun!  Tomorrow will be the last day and Saturday I'll post my pictures along with the pdf files.  I'll also add the pattern to Ravelry's database. 

Cloth Day Five:
Row 41:  (k1, p1) x2; k11; p1; k9; p1; k7; (p1, k1) x2.
Row 42:  (k1, p1) x2; k1; p7; k2; (p3, k1) x2; p10; k1; (p1, k1) x2.
Row 43:  (k1, p1) x2; k12; (p3, k1) x2; p1; k8; (p1, k1) x2.
Row 44:  (k1, p1) x2; k1; p7; k1; p2; k1; p16; k1; (p1, k1) x2.
Row 45:  (k1, p1) x2; k4; p1; k12; p1; k2; p1; k3; p1; k4; (p1, k1) x2.
Row 46:  (k1, p1) x2; k1; p8; k2; p17; k1; (p1, k1) x2.
Row 47:  (k1, p1) x3; k8; p1; k16; (p1, k1) x3.
Row 48 :  (k1, p1) x3; k1; p23; k1; (p1, k1) x3.
Row 49:  (k1, p1) x4; k21; (p1, k1) x4.
Row 50:  (k1, p1) x4; k1; p7; k1; p11; k1; (p1, k1) x4.

Bib Day Five:
Row 43:  (k1, p1) x2; k6; p1; k4; p1; k13; p1; k3; (p1, k1) x2.
Row 44:  (k1, p1) x2; k1; p2; k4; p7; k2; p1; k1; p10; k1; (p1, k1) x2.
Row 45:  (k1, p1) x2; k11; p1; k9; p1; k7; (p1, k1) x2.
Row 46:  (k1, p1) x2; k1; p7; k2; (p3, k1) x2; p10; k1; (p1, k1) x2.
Row 47:  (k1, p1) x2; k12; (p3, k1) x2; p1; k8; (p1, k1) x2.
Row 48:  (k1, p1) x2; k1; p7; k1; p2; k1; p16; k1; (p1, k1) x2.
Row 49:  (k1, p1) x2; k4; p1; k12; p1; k2; p1; k3; p1; k4; (p1, k1) x2.
Row 50:  (k1, p1) x2; k1; p8; k2; p17; k1; (p1, k1) x2.
Row 51:  (k1, p1) x3; k8; p1; k16; (p1, k1) x3.
Row 52:  (k1, p1) x3; k1; p23; k1; (p1, k1) x3.

Wednesday, January 19, 2011

Mystery KAL - Day Four

Cloth Day Four:
Row 31:  (k1, p1) x2; k10; p2; k11; p1; k5; (p1, k1) x2.
Row 32:  (k1, p1) x2; k1; p4; k1; p11; k1; p7; k1; p2; k1; (p1, k1) x2.
Row 33:  (k1, p1) x2; k12; p1; k11; p1; k4; (p1, k1) x2.
Row 34:  (k1, p1) x2; k1; p3; (k1, p11) x2; k1; (p1, k1) x2.
Row 35:  (k1, p1) x2; k9; p1; k2; p1; k12; p1; k3; (p1, k1) x2.
Row 36:  (k1, p1) x2; k1; p2; k1; p11; k1; p12; k1; (p1, k1) x2.
Row 37:  (k1, p1) x2; k13; p1; k4; p1; k6; p1; k3; (p1, k1) x2.
Row 38:  (k1, p1) x2; k1; p2; k1; p12; k1; p11; k1; (p1, k1) x2.
Row 39:  (k1, p1) x2; k6; p1; k4; p1; k13; p1; k3; (p1, k1) x2.
Row 40:  (k1, p1) x2; k1; p2; k4; p7; k2; p1; k1; p10; k1; (p1, k1) x2.

Bib Day Four:
Row 33:  (k1, p1) x2; k5; p4; k4; (p1, k7) x2; (p1, k1) x2.
Row 34:  (k1, p1) x2; k1; p5; k1; p9; k1; p2; k1; p8; k1; (p1, k1) x2.
Row 35:  (k1, p1) x2; k10; p2; k11; p1; k5; (p1, k1) x2.
Row 36:  (k1, p1) x2; k1; p4; k1; p11; k1; p7; k1; p2; k1; (p1, k1) x2.
Row 37:  (k1, p1) x2; k12; p1; k11; p1; k4; (p1, k1) x2.
Row 38:  (k1, p1) x2; k1; p3; (k1, p11) x2; k1; (p1, k1) x2.
Row 39:  (k1, p1) x2; k9; p1; k2; p1; k12; p1; k3; (p1, k1) x2.
Row 40:  (k1, p1) x2; k1; p2; k1; p11; k1; p12; k1; (p1, k1) x2.
Row 41:  (k1, p1) x2; k13; p1; k4; p1; k6; p1; k3; (p1, k1) x2.
Row 42:  (k1, p1) x2; k1; p2; k1; p12; k1; p11; k1; (p1, k1) x2.

Tuesday, January 18, 2011

Mystery KAL - Day Three

Are we having fun yet?  Here's today's rows:

Cloth Day Three:
Row 21:  (k1, p1) x2; k2; p2; k1; p1; k2; p3; k3; p1; k1; p2; k11; (p1, k1) x2.
Row 22:  (k1, p1) x2; k1; p9; k1; p2; k1; p3; (k1, p2) x3; k1; (p1, k1) x3.
Row 23:  (k1, p1 ) x2; (k2, p1) x5; k3; p1; k10; (p1, k1) x2.
Row 24:  (k1, p1) x2; k1; p9; k1; p3; k2; p1; k1; p2; k4; p2; k1; (p1, k1) x3.
Row 25:  (k1, p1) x2; k2; p3; k3; p1; k2; p2; k2; p1; k2; p1; k10; (p1, k1) x2.
Row 26:  (k1, p1) x3; k1; p6; k4; p4; k1; p1; k1; p8; k1; (p1, k1) x2.
Row 27:  (k1, p1) x3; k8; p1; k1; p1; k2; p1; k4; p1; k8; (p1, k1) x2.
Row 28:  (k1, p1) x2;(k1, p6) x2; k2; p3; k1; p4; k3; (p1, k1) x3.
Row 29:  (k1, p1) x2; k5; p4; k4; (p1, k7) x2; (p1, k1) x2.
Row 30:  (k1, p1) x2; k1; p5; k1; p9; k1; p2; k1; p8; k1; (p1, k1) x2.

Bib Day Three:
Row 23:  (k1, p1) x2; k5; p2; k3; p4; k2; p1; k12; (p1, k1) x2.
Row 24:  (k1, p1) x2; (k1, p5) x2; (k1, p2) x3; k1; p1; k2; p3; k1; (p1, k1) x2.
Row 25:  (k1, p1) x2; k2; p2; k1; p1; k2; p3; k3; p1; k1; p2; k11; (p1, k1) x2.
Row 26:  (k1, p1) x2; k1; p9; k1; p2; k1; p3; (k1, p2) x3; k1; (p1, k1) x3.
Row 27:  (k1, p1 ) x2; (k2, p1) x5; k3; p1; k10; (p1, k1) x2.
Row 28:  (k1, p1) x2; k1; p9; k1; p3; k2; p1; k1; p2; k4; p2; k1; (p1, k1) x3.
Row 29:  (k1, p1) x2; k2; p3; k3; p1; k2; p2; k2; p1; k2; p1; k10; (p1, k1) x2.
Row 30:  (k1, p1) x3; k1; p6; k4; p4; k1; p1; k1; p8; k1; (p1, k1) x2.
Row 31:  (k1, p1) x3; k8; p1; k1; p1; k2; p1; k4; p1; k8; (p1, k1) x2.
Row 32:  (k1, p1) x2;(k1, p6) x2; k2; p3; k1; p4; k3; (p1, k1) x3.

Monday, January 17, 2011

Mystery KAL - Day Two

Cloth Day Two:
Row 11:  (k1, p1) x2; k7; p1; k3; p1; k2; p1; k5; p1; k8; (p1, k1) x2.
Row 12:  (k1, p1) x2; k1; p12; (k1, p3) x2; k1; p6; k1; (p1, k1) x2.
Row 13:  (k1, p1) x2; k8; p4; k4; p1; k12; (p1, k1) x2.
Row 14:  (k1, p1) x2; k1; p2; k1; p8; (k1, p3) x2; k1; p7; k1; (p1, k1) x2.
Row 15:  (k1, p1) x2; k8; (p1, k3) x2; p1; k12; (p1, k1) x2.
Row 16:  (k1, p1) x2; k1; p11; k1; p3; k4; p8; k1; (p1, k1) x2.
Row 17:  (k1, p1) x2; k9; p1; k3; p1; k2; p1; k12; (p1, k1) x2.
Row 18:  (k1, p1) x2; k1; p11; k1; p2; k1; p3; k1; p8; k1; (p1, k1) x2.
Row 19:  (k1, p1) x2; k5; p2; k3; p4; k2; p1; k12; (p1, k1) x2.
Row 20:  (k1, p1) x2; (k1, p5) x2; (k1, p2) x3; k1; p1; k2; p3; k1; (p1, k1) x2.

Bib Day Two:
Row 13:  (k1, p1) x2; k14; p1; k14; (p1, k1) x2.
Row 14:  (k1, p1) x2; k1; p13; k1; p3; k4; p6; k1; (p1, k1) x2.
Row 15:  (k1, p1) x2; k7; p1; k3; p1; k2; p1; k5; p1; k8; (p1, k1) x2.
Row 16:  (k1, p1) x2; k1; p12; (k1, p3) x2; k1; p6; k1; (p1, k1) x2.
Row 17:  (k1, p1) x2; k8; p4; k4; p1; k12; (p1, k1) x2.
Row 18:  (k1, p1) x2; k1; p2; k1; p8; (k1, p3) x2; k1; p7; k1; (p1, k1) x2.
Row 19:  (k1, p1) x2; k8; (p1, k3) x2; p1; k12; (p1, k1) x2.
Row 20:  (k1, p1) x2; k1; p11; k1; p3; k4; p8; k1; (p1, k1) x2.
Row 21:  (k1, p1) x2; k9; p1; k3; p1; k2; p1; k12; (p1, k1) x2.
Row 22:  (k1, p1) x2; k1; p11; k1; p2; k1; p3; k1; p8; k1; (p1, k1) x2.

Sunday, January 16, 2011

Mystery KAL - Day One

Okay, so here we go.  In retrospect, I probably should have waited a week to start this, as the Monthly Dishcloth Yahoo Group KAL also begins today and I didn't want to compete with them.  Oh well, maybe mine will be more fun!  ;o)

Size:  approximately 8" from neck edge to bottom and 7 ½" wide

Materials:  One skein of worsted weight cotton in a solid color. Approximately 100 yards.

Needles:         US 5/3.75 mm or 6/4.0mm  You want the design to be fairly dense, so if the fabric is too loose, just drop down a needle size.

                        2 double pointed needles US 5/3.75mm for the knitted I-cord ties or Size G crochet hook for the crocheted ties.

Gauge:  4.5 sts. per inch, not critical.

Abbreviations:
k = knit
p = purl
psso:  pass slipped stitch over
k2tog.= knit 2 stitches together
p2tog.=purl 2 stitches together
sts. = stitches
dec. = decrease
dpn. = double pointed needle

* * * * * * * * * * * * * * * * * * * * 
Cloth Day One:
Cast on 37 stitches.
Rows 1 – 7:  k1, p1 across row.
Row 8:  (k1, p1) x2; (k1, p13) x2; k1; (p1, k1) x2.
Row 9:  (k1, p1) x2; k14; p1; k14; (p1, k1) x2.
Row 10:  (k1, p1) x2; k1; p13; k1; p3; k4; p6; k1; (p1, k1) x2.

* * * * * * * * * * * * * * * * * * * * 
Bib Day One:

Short Row Version

Cast on 37 stitches
Row 1:  k1, p1 for 26 sts.; turn (11 sts. unworked)
Row 2:  Slip 1 knitwise; (k1, p1) x8; k1; turn (8 sts. unworked)
Row 3:  Slip 1 knitwise; (p1, k1) x10; turn (8 sts. unworked)
Row 4:  Slip 1 knitwise; (p1, k1) x 11; p1; turn (5 sts. unworked)
Row 5:  Slip 1 knitwise; (k1, p1) x 13; turn (5 sts. unworked)
Row 6:  Slip 1 knitwise; (k1, p1 ) x14; turn (3 sts. unworked)
Row 7:  Slip 1 knitwise; (k1, p) x 15; turn (3 sts. unworked)
Row 8:  Slip 1 knitwise; (k1, p1) x 16; turn (1 sts. unworked)
Row 9:  Slip 1 knitwise; (k1, p1) x 17;  turn (1 sts. unworked)
Row 10:  Slip 1 knitwise; (k1, p1) x 17; k1.
Row 11:  k1, p1 across row.
Row 12:  (k1, p1) x2; (k1, p13) x2; k1; (p1, k1) x2.

Traditional Beginning

Pattern:  Cast on 15 sts.

Row 1:  p1, k1 across row.
Row 2:  Cast on 3 sts., k1, p1 across row. (18 sts.)
Row 3:  Cast on 3 sts., k1, p1 across row. (21 sts.)
Row 4:  Cast on 3 sts., p1, k1 across row.  (24 sts.)
Row 5:  Cast on 3 sts., p1, k1 across row.  (27 sts.)
Row 6:  Cast on 3 sts., k1, p1 across row.  (30 sts.)
Row 7:  Cast on 3 sts., k1, p1 across row.  (33 sts.)
Row 8:  Cast on 2 sts., k1, p1 across row.  (35 sts.)
Row 9:  Cast on 2 sts., k1, p1 across row.  (37 sts.)
Row 10:  k1, p1 across row.
Row 11:  k1, p1 across row.
Row 12:  (k1, p1) x2; (k1, p13) x2; k1; (p1, k1) x2.

Friday, January 14, 2011

KAL begins Sunday, January 16, 2011

I'm going to begin our KAL this coming Sunday, thanks to my great test knitters and my son.  Yes, I suddenly realized that I wasn't able to copy and past from Microsoft Word, so I was freaking out wondering how I was going to get the patterns posted.  Fortunately, he came to my rescue (as always) and sent me a couple of suggestions and I'm now up and running....I hope!

In any event, once again let me explain how this will work.  Each day for six days, I'll post about 10 rows.  One set will be for the bib and one set will be for the cloth.  You can pick whichever one you want to do.  Obviously, the bib is going to take longer, but by the time you get to the neck, you'll know what it is anyway.  If you are doing a bib, remember that I have two methods that you can use to begin it.  Either the easy short rows or by casting on stitches at the beginning of the rows.  As always, I hope you use the short rows.  They're easier (I think) and it gives you a nice rounded edge.  At the end of the six days, I'll post the full pattern and a picture.  I'll also put it up in a pdf file for you. 

For materials, you'll need to have one ball of worsted weight cotton in a SOLID color.  I emphasize solid as the design just won't show up in a variegated yarn and you'll just end up scratching your head trying to see what it is!  I recommend that you use a U.S. Size 6/4.0mm or a U.S. Size 5/3.75mm needle.  Remember you want your fabric to be dense so your stitches will pop and you'll be able to see the design.  Use whatever size needles you like.  If you're doing a bib, you'll also need either a couple of double pointed needles in the same size or a crochet hook Size G, depending on whether you are knitting or crocheting the ties.

That's it!  Any questions?

Tuesday, January 11, 2011

Still on Track

Well, it sounds like the KAL might be a good idea. Thanks for all the nice comments that everyone has sent to me, both here and on Ravelry. I appreciate them all! I've decided that I'm going to split the KAL into two, one for the bib and one for the cloth. It will be the same design, but just two different projects. Each day I'll post the rows for the bib and the dishcloth separately, just so you (or I) won't get confused! I'm hoping that you'll enjoy it. I'm just waiting to hear if the bib passes the test knit and then we'll be good to go! Did you pick out a color yet? I stitched my bib in Peaches 'n Creme Lt. Blue and the cloth in Lt. Grape and I liked them both.

While you're waiting, I thought I would share the rest of the hats I knit for Christmas. First up, for my beautiful daughter-in-law, I made "London". This is a free pattern on Ravelry. She wanted something slouchy that would cover her hair. Well, she didn't actually ask for it, I just kind of knew that's what she had in mind! (Notice that I now have a stryrofoam head, no more blown up balloons! My sister had it rolling around in her closet and it's kind of banged up, but works great!)

This is a neat pattern and was surprisingly quick to knit. First, you knit a circle for the top (or bottom) of the hat and then you pick up stitches around the perimeter and knit down to the brim. If you don't belong to Ravelry, you can still find this pattern on the Internet. Just google the designer, Tina Laiho, and scroll down to where the pdf is posted. I would copy and paste the link, but for some reason, this new computer won't let me copy and paste links to the blog. I think there's a setting that's off, but I'm waiting for my tech son to straighten it out. Anyway, I used Crystal Palace's Mochi Plus. If you've ever knit with this yarn, you'll know that it's a royal pain to try and match up the color. Ordinarily, I like mismatched, but not when there's a definite color sequence. I was afraid that I wouldn't have enough yarn, but by some miracle, every color change matched perfectly. I couldn't believe it! I used two and one-third balls, because I wanted to make sure it was long enough.

Next, I knit a simple hat for my son. As soon as I saw this pattern, I knew I wanted it. I love the neat design and it was also easy to knit.

The pattern is called "Berruti" and is for sale for $1.99 at Knitpicks as one of their independent designer patterns. I used yummy Malabrigo in Rich Chocolate. (Doesn't that sound good?!)
I saved the best for last. This wasn't a Christmas present, but when I noticed that my oldest grandson, Jack, was trying on his brother's sheep hat, I felt bad that I hadn't knit him a special hat too. I asked him if he'd like a hat and, if so, what would he like. I wasn't prepared for his answer though. He wanted a house finch! A house finch, really? I didn't even know what a house finch looked like! Still, being the good grandma that I am, or try to be, I did my research and voila, here's his hat:

Jack is only seven, but he's obsessed with birds. He reads every book on birds he can get his hands on, and not kids books either. He goes right to the adult section. He knows more about birds than anyone I know. He even studies their songs and can tell you the difference. (My husband remarked one day that the wood duck sounded like a seagull, and Jack did an imitation of a seagull, just so we could hear the difference between them.)
In any event, I knew I'd have to be fairly accurate to please Jack and he was delighted. He had told me that he wanted a round hat, not one with points, like his brother's sheep hat. I used the "rib-a-roni" hat pattern on Ravelry, but you can also find it here. Just look in her sidebar for the free download. Obviously, I didn't do any of the ribbing that the pattern calls for, but it still came out great. After I knit the hat, I just duplicate stitched the finch and did a little embroidery here and there. I'm happy to report that he wore the hat all day inside the house.
I hadn't made matching mittens as I just figured there would be no way to do a bird on them, so I knit him a plain pair. I know, I know, what was I thinking!! He was so disappointed that they were plain. So, back to the drawing board. I decided it was easier to just knit him another pair, rather try to embroider after the mitten is closed. If you do the duplicate stitch before you start the decreases and add the thumb, you can stick your fingers inside and it's much easier! Jack hasn't seen them yet, but I'm thinking he's going to love them.

I used Lorna's Laces Greenline Worsted for the hat and DK for the mittens in denim blue. I knit the mittens on a 2.75mm needle and I love how nice and firm they knitted up. They seem like they'll not only be soft, but nice and toasty too.
Let's just hope he doesn't lose one in a snowbank!

Saturday, January 8, 2011

Anyone up for a KAL?

A new year and a new beginning! I'm sorry that I haven't posted in quite awhile. I've had some personal things that have kept my focus off the blog. On top of that, I had some very unpleasant exchanges with knitters who can't read or understand my copyright. To be honest, those incidents had me seriously considering shutting down the blog and moving on. Still, 97% of my readers are nice and respectful, so I've decided to keep the blog active. Besides I like sharing patterns.

Just for fun, I thought I might have a KAL (knit-a-long) to kick off a brand new pattern that I have for January. What do you think? Is anyone interested? The pattern is still being test knitted, but I should have it ready to roll by next week. This is definitely a winter themed project so I would stick with a "cool" color and stay away from yellows, oranges, browns, etc. Blues would be ideal, although lavenders, pinks, or greens would all work well too. Those of you who read my blog regularly, know that I have done KALs in the past for the Yahoo Monthly Dishcloth Group. Since not everyone belongs and can't participate in the fun, I thought I would do one here and let you all have first crack at the pattern!

Did everyone finish up their Christmas knitting on time? I don't usually knit for Christmas, but this year, I made an exception and knit a few hats. My 5 year old grandson just loves Shaun the Sheep, so I thought it would be fun to knit him up a hat. A search on Ravelry soon produced a free pattern that was ideal. I did have to tweak it just a bit to make it fit, but it came out really well and Mickey loved it.

The hat pattern is my own. I used U.S. Size 9 needles and cast on 84 stitches. Then I did a k2, p2 rib for about 1 1/2 inches before I began the design. The length of the hat is 8 inches. Gauge is 5 sts. = 1 inch. I folded it with the seam in back and kitchner stitched the top stitches. You could also do a three needle bind off. Then I just seamed up the back, and voila, an instant hat! When he wears it, the corners form these two cute peaks.

The hat was knit with Lorna's Laces Greenline worsted in Ysolda Red. I was amazed at how soft this yarn is when knitted. The hat is knit flat (ugh), but I really didn't have any choice, as I used intarsia. The white yarn is Sirdar's Snowflake in Dk that I held doubled. It gives it a nice fuzzy look, perfect for a sheep.

Of course, you can't have a hat without mittens, now can you?
The mittens were knit with the same yarn, only in DK weight. For these, I just used a basic mitten pattern and then duplicate stitched the sheep faces. I did the sheep chart myself, since I just needed something small. For the eyes, I used a tiny piece of white felt cut in the shape of a figure eight and then I embroidered the pupils with French knots.

A cute set and a huge hit, although I was competing with Legos and an array of other gifts!

Notice how nice and red these pictures are? I had an accident with my old camera right before Christmas, so I had to replace it with this super duper new one. I can't believe how accurate the color shows up, especially since red is so difficult to photograph. I still have to learn how to use it as it has a lot more buttons and menus than my old one.

Okay, so then, I'll be back with the new pattern, provided anyone is interested!