Now, after having explained that, I want to introduce you to an ALTERNATIVE method to making the increases at the beginning of the bib. This method uses short rows. I know, I know, you’re all sighing and exclaiming that you can’t possibly do short rows, but I assure you that it’s super simple. So simple, in fact, that you’ll never want to cast on stitches at the beginning of rows again. All you need to know is how to knit and how to purl. That’s it, no wrapping stitches, no picking up wraps, no swearing, no sweating. I promise! To prove it, here’s a short tutorial for you to try.
Let’s imagine that the bib (with a seed stitch border) is 37 stitches across. To begin, cast on all 37 stitches, and k1, p1 for 24 stitches. Now, turn your work around so you’ll be working in the opposite direction. There will be 13 stitches on your right hand needle that you have not worked. The yarn tail should be at the back of your work and you slip the first stitch on the left hand needle as if you’re going to knit it (knitwise). Now k1, p1 for 13 sts.; turn. You will have 10 unworked stitches on your right hand needle. Continue in this manner as follows: (NOTE: If you lose your count, all you have to do is make sure that you have the correct number of unworked stitches, when you turn your work!)
Row 3: Slip 1 st. knitwise; p1, k1 for 16 sts.; turn. (10 unworked stitches)
Row 4: Slip 1 st. knitwise; p1, k1 for 19 sts.; turn. (7 unworked stitches)
Row 5: Slip 1 st. knitwise; k1, p1 for 22 sts.; turn. (7 unworked stitches)
Row 6: Slip 1 st. knitwise; k1, p1 for 25 sts.; turn. (4 unworked stitches)
Row 7: Slip 1 st. knitwise; p1, k1 for 28 sts.; turn. (4 unworked stitches)
Row 8: Slip 1 st. knitwise; p1, k1 for 30 sts.; turn. (2 unworked stitches)
Row 9: Slip 1 st. knitwise; p1, k1 for 32 sts.; turn. (2 unworked stitches)
Row 10: Slip 1 st. knitwise; p1, k1 to end; turn.
Rows 11: k1, p1 across row.
Wasn’t that easy? The result is a nice smooth border and no annoying holes.
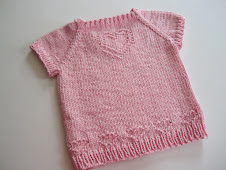
Now that you know how to do the short rows, here’s a little pattern to reward you. It’s called “Heartbeat” and the directions are in the sidebar with the other free pdfs.

I know it can be a pain to leave feedback, but I really want to hear how you like this method. Every one of my testers loved it and I hope you will too!

6 comments:
Ohhh this sounds like a great way of doing it, I am just finishing a baby blanket and am dying to make the imp bib so I will try it then, yay it will get rid of my uneven casting on :)
Thank you so much for sharing, that sounds like a really awesome method xox
I haven't tried your short row yet, but probably will soon.
Glad to see that Petite Purls has your Elephant Bib pattern. Congrats on being Published!
It's so kind of you to give us these free instructions and patterns. Thank you so much!
This knits up like a dream, I made it in light blue for a baby boy! Great job as usual Elaine!
Hugs
Alli
Can you help me, page one isnt appearing on the heartbeat pattern.
I am interested in making a dishcloth . Can you help me get the heartbeat pattern
Post a Comment