Updated patterns!

I'm in the process of updating my old patterns, particularly the bibs, to include charts. I'm rewriting some of the directions to make the patterns even easier and including alternative methods for beginning the bibs and for making the ties. Look for these patterns in the sidebar to see which ones have been added. It's a slow process, but eventually, they'll all be there!


Saturday, October 16, 2010

Baby Ripples


Copyright 2010 by Elaine Fitzpatrick. Permission is granted to make and sell items from this pattern provided that credit is given to me as the designer. Permission is not granted to reproduce the actual pattern, or post it, or distribute it, without my express permission. Please respect my copyright and play nice!

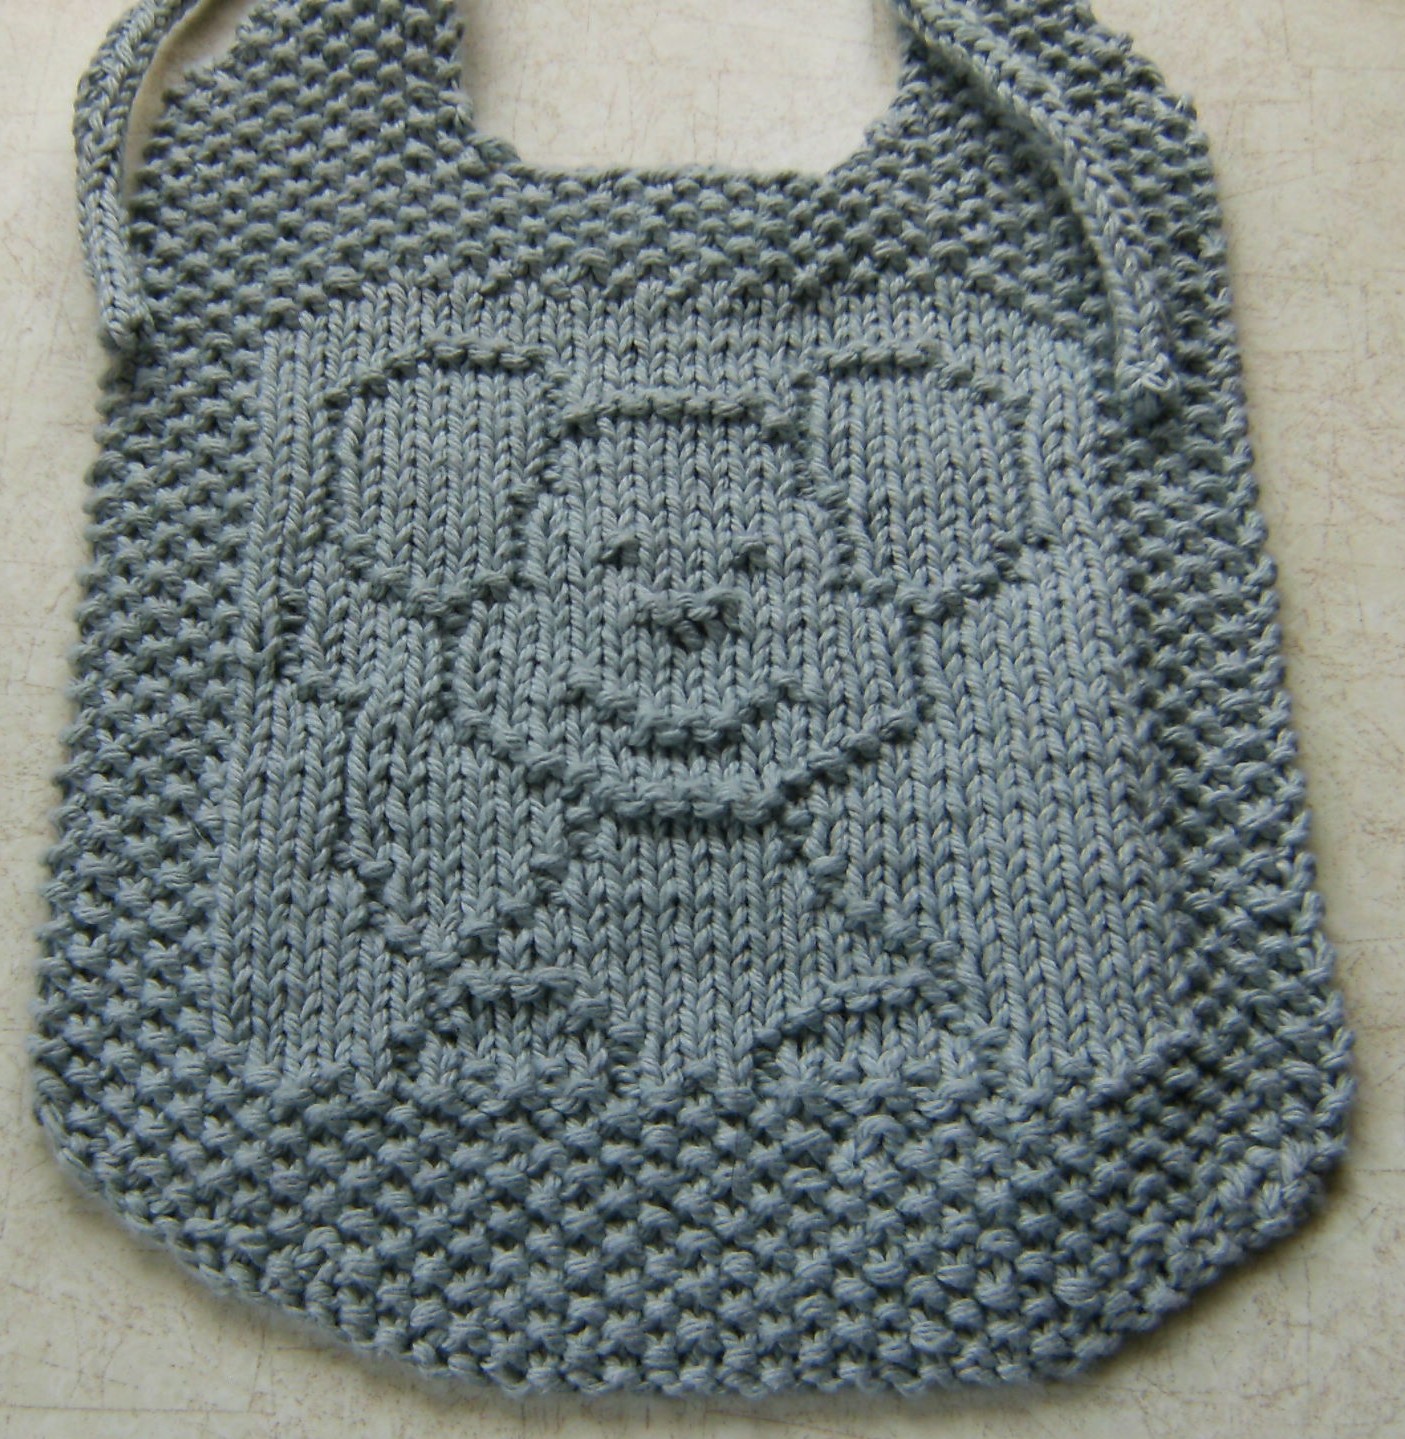
Bib Size: approximately 8" from neck edge to bottom and 7 ½" wide
Cloth Size: approximately 7 ½" X 7 ½"

Materials: I love those pretty cotton yarns with the wide stripes made by Sugar’n Cream and I wanted to design a bib specifically for them. I think this pattern works well, however, if you want the shoulders and the ties to match up, then you’ll probably need to have two balls and you will have to sacrifice some yarn to achieve the symmetry. If you’re using a variegated or a solid yarn, then one ball is sufficient. You need about 88 – 100 yards when knit to the suggested gauge. Samples were done in Pinky Stripes and Baby Pink.

Needles: US 5/3.75 mm or 6/4.0mm
2 double pointed needles US 5/3.75 mm for the knitted I-cord ties
or
Size G crochet hook for the crocheted ties

Gauge: 4.5 sts. per inch.

Stitch Markers (optional). Although this is a simple lace pattern, you might want to use markers between the lace repeats to help you keep your place in the pattern. The pattern repeats every 9 stitches between the borders.

PATTERN NOTES
This pattern allows you to choose between two methods of beginning the bib. One uses short rows and the other, more traditional way, requires you to cast on stitches at the beginning of the first few rows of the pattern. The short row method is really easy and gives you a nice smooth line. There are also two methods for doing the ties. One has crocheted ties and the other method uses knitted I-cords. The crocheted ties are slightly thinner. If you do make the knitted ties, you can drop down a needle size when knitting the cords. I like to run a long tail down the center of the cord to finish it off. Be sure to use a straight needle and not one with a bent tip!

Abbreviations:
k = knit
p = purl
kfb = knit in the front and the back of the stitch
slip 1 = slip the stitch as if to purl
psso = pass slipped stitch over
k2tog.= knit 2 stitches together
p2tog.=purl 2 stitches together
sts. = stitches
dec. = decrease
dpn. = double pointed needle

Short Row Version

For this method, you don’t have to wrap stitches or pick up wraps. You just work the stitches to a point and turn your work around and start knitting in the opposite direction. I’ve written out every row for you and I’ve indicated how many stitches you should have remaining at the end of each row. If you lose your count, all you have to do is check on the number of stitches you have left on your needle and you’ll be right back on track. This technique results in a nice smooth edge. Note: The bottom of the bib might cup a little, but if you give it a quick burst of steam when you’re done, it will flatten right out.

Pattern: Cast on 39 sts. Note: To begin this bib with a striped yarn, I recommend that you start by finding the first color change and then cut the yarn at that point so you are starting at the beginning of a color change. Now measure about 30 inches and begin casting on your stitches. I like to use the long tail cast on, but use whatever method you like. I’ve found that by starting at this point, and knitting to gauge, you’ll get the best results.

Row 1: (right side) k26 sts., turn. You will have 13 stitches that are unworked.
Row 2: (wrong side) slip 1 st. knitwise, k15 sts.; turn. (10 unworked stitches)
Row 3: Slip 1 st. knitwise; k 18 sts.; turn. (10 unworked stitches)
Row 4: Slip 1 st. knitwise; k 21 sts.; turn. (7 unworked stitches)
Row 5: Slip 1 st. knitwise; k 24 sts.; turn. (7 unworked stitches)
Row 6: Slip 1 st. knitwise; k 26 sts.; turn. (5 unworked stitches)
Row 7: Slip 1 st. knitwise; k 28 sts.; turn. (5 unworked stitches)
Row 8: Slip 1 st. knitwise; k 30 sts.; turn. (3 unworked stitches)
Row 9: Slip 1 st. knitwise; k 32 sts.; turn. (3 unworked stitches)
Row 10: Slip 1 st. knitwise; k 34 sts.; turn. (1 unworked stitch)
Row 11: Slip 1 st. knitwise; k 36 sts.; turn (1 unworked stitch)
Row 12: Slip 1 st. knitwise, knit to end.
Row 13: knit.Continue in pattern beginning with Row 12 below*.

Traditional Version

This method requires you to cast on stitches at the beginning of each row. I prefer to use the knitted cast on method, but you can use any method that you like. Just remember to keep the stitches tight.

Pattern: Cast on 13 stitches.

Row 1: knit across.
Row 2: Cast on 3 sts. at beginning of row, knit across row. (16 sts.)
Row 3: Cast on 3 sts. at beginning of row, knit across row. (19 sts.)
Row 4: Cast on 3 sts. at beginning of row, knit across row. (22 sts.)
Row 5: Cast on 3 sts. at beginning of row, knit across row. (25 sts.)
Row 6: Cast on 3 sts. at beginning of row, knit across row. (28 sts.)
Row 7: Cast on 3 sts. at beginning of row, knit across row. (31 sts.)
Row 8: Cast on 2 sts. at beginning of row, knit across row. (33 sts.)
Row 9: Cast on 2 sts. at beginning of row, knit across row. (35 sts.)
Row 10: Cast on 2 sts. at beginning of row, knit across row. (37 sts.)
Row 11: Cast on 2 sts. at beginning of row, knit across row. (39 sts.)
*Row 12: knit.

Begin lace pattern: The first and last 6 stitches of every row form the borders. The lace has three repeats each with 9 stitches.

Row 13: k6; (k2tog., k1, kfb into the next two stitches; k2; slip 1, k1, psso) x3; k6.
Row 14: k6; p27; k6.
Row 15: same as 13.
Row 16: same as 14.
Row 17: same as 13.
Rows 18-20: knit.
Repeat Rows: 13 – 20 four times for a total of five repeats.
Knit 4 rows.

Bind off for Neck:
Knit 14 stitches. Slip sts. just worked onto stitch holder, bind off the next 11 stitches knitwise; work across remaining sts. in established pattern: 14 stitches each side.

Neck and Shoulder Shaping – LEFT Shoulder
Note
: IF you are using the striped cotton, you will now need to calculate where you are in your color sequence so when you knit the right shoulder, it will match (if you want them to match!) Most likely you will have to use the second ball to get it to line up. As you look at the bib with the right side facing, the first shoulder worked will be the left side. All the decreases are made on right side or odd numbered rows.

Row 1: knit.

Neck decreases:
Row 2: (right side) Slip 1 knitwise, k1, psso; knit to end. (13 sts.)
Row 3: knit.
Row 4: Slip 1 knitwise, k1, psso; knit to end. (12 sts.)
Row 5: knit.
Row 6: Slip 1 knitwise, k1, psso; knit to end. (11 sts.)
Row 7: knit.

Shoulder decreases:
Row 8: (right side) knit across to last 2 sts, k2tog. (10 sts.)
Row 9: knit.
Row 10: knit across to last 2 sts., k2tog. (9 sts.)
Row 11: knit.
Row 12: knit across to last 2 sts., k2tog. (8 sts.)
Row 13: knit.
Row 14: knit across to last 2 sts., k2tog. (7 sts.)
Row 15: knit.
Row 16: knit across to last 2 sts., k2tog. (6 sts.)
Row 17: knit.
Row 18: knit across to last 2 sts., k2tog. (5 sts.)
Row 19: knit.
Row 20: Slip 1 knitwise, k1, psso; k1, k2 tog. (3 sts.)

For the crocheted ties, slip your crochet hook through the three stitches and draw your yarn through. Then work a chain for about 12 - 14 inches. The crocheted ties are not as stretchy as the knitted ones, so you might want to make these slightly longer. When you reach the desired length, work back on the chain by inserting your hook in the second chain stitch nearest the end and slip stitch in each chain until you are back to the beginning. Fasten the yarn securely and weave in the ends. I have a “mini-tutorial” for making the crocheted ties on my blog. http://downcloverlaine.blogspot.com/2010/05/ties-that-bind.html

For the knitted ties, slip these 3 sts. to a dpn work an I-cord for approximately 12 inches. Fasten off and run end down through middle of I-cord. Don't worry if the
I-cords look a little wonky. A firm tug will usually straighten them out and after the bib is washed, you won't even notice! A good tutorial for making the I-cords can be found here: http://www.knittinghelp.com/videos/knitting-tips


Neck and Shoulder Shaping – RIGHT Shoulder
With wrong side facing, slip sts. from stitch holder to left needle and join yarn at neck edge. This is where you need to pay attention to the color sequence to make it match the other shoulder. All the decreases are made on right side or odd numbered rows.

Row 1: (wrong side) knit across row.

Neck decreases:
All the decreases are made on right side rows.
Row 2: knit across to last 2 sts., k2tog. (13 sts.)
Row 3: knit.
Row 4: knit across to last 2 sts., k2tog. (12 sts.)
Row 5: knit.
Row 6: knit across to last 2 sts., k2tog. (11 sts.)
Row 7: knit.

Shoulder decreases:
Row 8: Slip 1 knitwise, k1, psso; knit across row. (10 sts.)
Row 9: knit.
Row 10: Slip 1 knitwise, k1, psso; knit across row. (9 sts.)
Row 11: knit.
Row 12: Slip 1 knitwise, k1, psso; knit across row. (8 sts.)
Row 13: knit.
Row 14: Slip 1 knitwise, k1, psso; knit across row. (7 sts.)
Row 15: knit.
Row 16: Slip 1 knitwise, k1, psso; knit across row. (6 sts.)
Row 17: knit.
Row 18: Slip 1 knitwise, k1, psso; knit across row. (5 sts.)
Row 19: knit.
Row 20: Slip 1 knitwise, k1, psso; k1; k2tog. (3 sts.)

Work tie to correspond with the one you worked for the other side.

Weave in ends.

* * * * * * * * * * * * * * * * * * * * * * * * * *

Dishcloth

Cast on 39 stitches and knit 10 rows. You’ll have five garter ridges.

Begin Lace Pattern:

Row 1: k6; (k2tog., k1, kfb into the next two stitches; k2; slip 1, k1, psso) x3; k6.
Row 2: (wrong side) k6; p27; k6.
Row 3: same as 1.
Row 4: same as 2.
Row 5: same as 1.
Rows 6 – 8: knit.
Repeat Rows: 1 – 8 four times for a total of five repeats.
Knit 7 rows. You should have five garter ridges and end with a right side row.

Bind off knitwise and weave in ends.


Wednesday, October 6, 2010

Where ARE you Mom?

So that's the email I received from my son the other day. Apparently, he actually reads my blog! Who knew? Anyway, he was concerned that I haven't posted in awhile. I told him I was just lazy, but the truth is that I've been working on some new designs and you all know how much I like to keep them secret. I can't (or won't) talk about them, so that just leaves more sock knitting. The weather has been so gloomy and rainy here in Massachusetts that I can't even take a decent picture to show those off to you either. That leaves just one thing I can talk about. A pattern for a hat and some matching mittens that my good friend, Alli, will be selling on her website here.

The design is based on her "Fishy Wishy" dishcloth pattern. As soon as I saw it, I immediately thought that it would make a cute hat for my youngest grandson, Marty, who loves fish. It's still a work in progress, but here's a few pictures being shown off by his brother, 5 year old Mickey, in typical boy fashion.

Marty may like fish, but he doesn't like wearing hats or standing still for any length of time. Mickey was reluctant to model as well, but for a different reason. He only likes RED. It took some convincing, but when I assured him that he wouldn't have to keep it, he agreed.

It's too bad that he doesn't like blue, because it's such a good color on him. Of course, I think ANY color looks good on him!

It's a lot harder to write up a pattern for mittens than it is for a dishcloth. I think that's what's taking me so long to get it finished. I know what I mean, but will you?!

I'm glad to hear that many of you have the dishcloth calendar, although I am pretty jealous. Wouldn't you think that the designers would have received the first digital copies? Apparently, we're on the bottom of the list. So much for being appreciated! Maybe next year, I'll just do my own thing, whatever that might be!

Next week I should have something brand new. It's different from anything I've done before and I quite like it. Hopefully, you will too! The rain should have moved on by then so I can even take some pictures!

Sunday, September 12, 2010

Calendar Day!

Today is the day that the official 2011 Dishcloth Calendar goes on sale. You can find all the ordering information by either going directly to the site http://www.dishclothcalendar.com/ or by clicking on the picture of the calendar's cover to the right in my sidebar.

I thought today would be a good day to post my two other designs that are in the calendar. The first is a horse, which I call "Pete" after a horse from my childhood. He lived right across the street from my grandparents and I can remember tiptoeing carefully to his stable to get a glimpse of him. I had a bad experience with a horse (well, actually a pony) when I was a child and since then, I've always been a little afraid of horses. I like to look at them from a distance!
I guess I could never have lived in the Old West. Patting a horse's nose is as close as I care to get! The cloth is knitted in Peaches & Creme Army Tan and the bib is done in Camel.
The second design is a lamb which I call "Eleanor" after my great aunt. She was a great aunt too! I don't think I've ever known anyone who was as gifted in needlework as she was. Her work was even featured on the Today Show years ago. I always loved to visit her and see whatever new project was in her basket.

Rug hooking, smocking, needlepoint, or counted cross stitch, you name it. If it involved a hook or a needle, she could do it. The only thing that I never remember her doing was knitting. I wish I had asked her why, but at the time, I was just fascinated with all her other skills. Why name this cloth after her? Well, her last name was "Lamb" and she had quite a collection of them!
My grandmother was the knitter. She's the one who taught me when I was only six and then gave me repeated refresher courses as I grew older. I have her original mitten pattern that I now use to knit mittens for my own grandchildren. Here's a picture of a little knitted coat that she made. I'm told it was a pretty shade of green. My favorite color!

As you can see, it's an old picture...... as is the the model. Me!
In any event, I hope that if you do purchase the calendar, you'll enjoy it. This time around it also includes some recipes, all in keeping with the country theme.
In parting, I want to share a photo that Denise, a wonderful test knitter and all around nice person, took. These are all three of the bibs that she test knit for the calendar. I'm sure you'll all agree that she is one talented knitter!
Don't you just love that purple cow?

Monday, September 6, 2010

Happy Labor Day!

Another KAL is now completed and I can post the pattern here, for all of you who are interested. This was just a fun cloth and really doesn't have anything to do with the season, although it is starting to get cooler here in New England and soon these little critters will be heading indoors to seek some warmth. If they try to get into my house, they'll have to deal with my two cats, Gilligan and Wyatt Earp! That said, my cats are more lovers than killers, so they'd be likely to make new friends as opposed to actually protecting my home!
I'm not sure anyone actually knitted this cloth. For three days, I was the only one who posted any messages on the yahoo group! I think everyone is trying to get in the very last bit of summer!
I hope everyone is enjoying a pleasant Labor Day! For me, this is an aptly named day as it's my oldest son's birthday. (Happy Birthday Mike!)

Do I Smell Cheese?

Copyright 2010 by Elaine Fitzpatrick. Permission is granted to make and sell items from this pattern provided that credit is given to me as the designer. Permission is not granted to reproduce the actual pattern, or post it, or distribute it, without my express permission. Please respect my copyright and play nice!

Size: approximately 8 ½ ” from neck edge to bottom and 8 " wide

Materials: One skein of worsted weight cotton in a solid color such as Peaches & Crème or Sugar ‘n Cream if you are using the bib for meals. If, on the other hand, you want to use it as a “drool” bib, I would recommend using a superwash wool. The cotton has a tendency to absorb the moisture, whereas the superwash wool will wick the moisture and keep baby nice and dry! Sample was done in Peaches & Crème Silver Gray.

Needles: US 5/3.75 mm or 6/4.0mm You want the bib to be fairly dense, so if the fabric is too loose, just drop down a needle size.

2 double pointed needles US 5/3.75 mm for the knitted I-cord ties
or
Size G crochet hook for the crocheted ties

Gauge: 4.5 sts. per inch, not critical.

PATTERN NOTES
This pattern allows you to choose between two methods of beginning the bib. One uses short rows and the other, more traditional way, requires you to cast on stitches at the beginning of the first few rows of the pattern. There are also two methods for doing the ties. One has crocheted ties and the other method uses knitted I-cords. The crocheted ties are slightly thinner. If you do make the knitted ties, you can drop down a needle size when knitting the cords. I like to run a long tail down the center of the cord to finish it off. Be sure to use a straight needle and not one with a bent tip!

Abbreviations:
k = knit
p = purl
psso: pass slipped stitch over
k2tog.= knit 2 stitches together
p2tog.=purl 2 stitches together
sts. = stitches
dec. = decrease
dpn. = double pointed needle

Short Row Version

For this method, you don’t have to wrap stitches or pick up wraps. You just work the stitches to a point and turn your work around and start knitting in the opposite direction. I’ve written out every row for you and I’ve indicated how many stitches you should have remaining at the end of each row. If you lose your count, all you have to do is check on the number of stitches you have left on your needle and you’ll be right back on track. This technique results in a nice smooth edge.

Cast on 37 stitches
Row 1: k1, p1 for 26 sts.; turn (11 sts. unworked)
Row 2: Slip 1 knitwise; k1, p1, for 17 sts.; turn (8 sts. unworked)
Row 3: Slip 1 knitwise; p1, k1, for 20 sts.; turn (8sts. unworked)
Row 4: Slip 1 knitwise; p1, k1, for 23 sts.; turn (5 sts. unworked)
Row 5: Slip 1 knitwise; k1, p1, for 26 sts.; turn (5 sts. unworked)
Row 6: Slip 1 knitwise; k1, p1, for 28 sts.; turn (3 sts. unworked)
Row 7: Slip 1 knitwise; k1, p1, for 30 sts.; turn (3 sts. unworked)
Row 8: Slip 1 knitwise; k1, p1, for 32 sts.; turn (1 sts. unworked)
Row 9: Slip 1 knitwise; k1, p1, for 34 sts.; turn (1 sts. unworked)
Row 10: Slip 1 knitwise; k1, p1, for 35 sts.
Row 11: k1, p1, across row.
Continue with *Row 12 of pattern.

OR

Traditional Beginning

Pattern: Cast on 15 sts.

Row 1: p1, k1 across row.
Row 2: Cast on 3 sts., k1, p1, across row. (18 sts.)
Row 3: Cast on 3 sts., k1, p1, across row. (21 sts.)
Row 4: Cast on 3 sts., p1, k1, across row. (24 sts.)
Row 5: Cast on 3 sts., p1, k1, across row. (27 sts.)
Row 6: Cast on 3 sts., k1, p1, across row. (30 sts.)
Row 7: Cast on 3 sts., k1, p1, across row. (33 sts.)
Row 8: Cast on 2 sts., k1, p1, across row. (35 sts.)
Row 9: Cast on 2 sts., k1, p1, across row. (37 sts.)
Row 10: k1, p1, across row.
Row 11: k1, p1, across row.
*Row 12: k1, p1, across row.
Row 13: (k1, p1) x5; k1; p5; (k1, p1) x2; k1; p5; (k1, p1) x5; k1.
Row 14: k1, p1, across row.
Row 15: (k1, p1) x3; k4; p1; k5; p1; k3; p1; k5; p1; k4; (p1, k1) x3.
Row 16: (k1, p1) x2; k1; (p5, k1) x2; p3; (k1, p5) x2; k1; (p1, k1) x2.
Row 17: (k1, p1) x2; k7; p1; k3; p1; k5; p1; k3; p1; k7; (p1, k1) x2.
Row 18: (k1, p1) x2; k1; p6; k4; p7; k4; p6; k1; (p1, k1) x2.
Row 19: (k1, p1) x2; k7; p1; k13; p1; k7; (p1, k1) x2.
Row 20: (k1, p1) x2; k1; p6; k1; p13; k1; p6; k1; (p1, k1) x2.
Row 21: (k1, p1) x2; k8; p1; k11; p1; k1; p1; k6; (p1, k1) x2.
Row 22: (k1, p1) x2; k1; p4; k1; p3; k1; p9; k1; p8; k1; (p1, k1) x2.
Row 23: (k1, p1) x2; k10; p1; k7; p1; k4; p1; k5; (p1, k1) x2.
Row 24: (k1, p1) x2; k1; (p4, k1) x2; p7; k1; p9; k1; (p1, k1) x2.
Row 25: (k1, p1) x2; k11; p1; k5; p1; k6; p1; k4; (p1, k1) x2.
Row 26: (k1, p1) x2; k1; p3; k1; p6; k1; p5; k1; p10; k1; (p1, k1) x2.
Row 27: (k1, p1) x2; k12; p5; k7; p1; k4; (p1, k1) x2.
Row 28: (k1, p1) x2; k1; p3; k1; p6; k1; p5; k1; p10; k1; (p1, k1) x2.
Row 29: (k1, p1) x2; k10; p1; k7; p1; k5; p1; k4; (p1, k1) x2.
Row 30: (k1, p1) x2; k1; p3; k1; p4; k1; p9; k1; p8; k1; (p1, k1) x2.
Row 31: (k1, p1) x2; k8; p1; k4; p3; k4; p1; k3; p1; k4; (p1, k1) x2.
Row 32: (k1, p1) x2; k1; p3; k1; p2; k1; p4; k1; p3; k1; p4; k1; p6; k1; (p1, k1) x2.
Row 33: (k1, p1) x2; k7; p1; k3; p1; k5; p1; (k3, p1) x3; k1; p1; k1.
Row 34: (k1, p1) x3; k1; p4; k1; p13; k1; p6; k1; (p1, k1) x2.
Row 35: (k1, p1) x2; k7; p1; k13; p1; k4; p1; k2; (p1, k1) x2.
Row 36: (k1, p1) x3; k1; p4; (k1, p6) x3; k1; (p1, k1) x2.
Row 37: (k1, p1) x2; k6; p2; k5; p3; k5; p2; k3; p1; k2; (p1, k1) x2.
Row 38: (k1, p1) x2; k1; p4; k1; p2; k1; p11; k1; p2; k1; p4; k1; (p1, k1) x2.
Row 39: (k1, p1) x2; (k4, p1) x2; k9; (p1, k4) x2; (p1, k1) x2.
Row 40: (k1, p1) x2; k1; p3; k1; p4; k1; p2; k1; p3; k1; p2; k1; p4; k1; p3; k1; (p1, k1) x2.
Row 41: (k1, p1) x2; k3; p1; k5; p1; k9; p1; k5; p1; k3; (p1, k1) x2.
Row 42: (k1, p1) x2; k1; p2; k1; p5; k1; p9; k1; p5; k1; p2; k1; (p1, k1) x2.
Row 43: (k1, p1) x2; k3; p1; k5; p1; k9; p1; k5; p1; k3; (p1, k1) x2.
Row 44: (k1, p1) x2; k1; p2; k1; p6; k1; p7; k1; p6; k1; p2; k1; (p1, k1) x2.
Row 45: (k1, p1) x2; k3; p1; k6; p1; k7; p1; k6; p1; k3; (p1, k1) x2.
Row 46: (k1, p1) x2; k1; p2; k1; p6; k1; p7; k1; p6; k1; p2; k1; (p1, k1) x2.
Row 47: (k1, p1) x2; k3; p1; k6; p2; k5; p2; k6; p1; k3; (p1, k1) x2.
Row 48: (k1, p1) x2; k1; p2; k1; p6; k1; p1; k5; p1; k1; p6; k1; p2; k1; (p1, k1) x2.
Row 49: (k1, p1) x2; k4; p1; k5; p1; k7; p1; k5; p1; k4; (p1, k1) x2.
Row 50: (k1, p1) x2; k1; (p4, k1) x2; p7; (k1, p4) x2; k1; (p1, k1) x2.
Row 51: (k1, p1) x2; k6; p4; k9; p4; k6; (p1, k1) x2.
Row 52: (k1, p1) x2; k1; p27; k1; (p1, k1) x2.
Row 53: (k1, p1) x3; k25; (p1, k1) x3.
Row 54: (k1, p1) x3; k1; p23; k1; (p1, k1) x3.
Row 55: (k1, p1) x4; k21; (p1, k1) x4.
Rows 56 – 62: k1, p1, across row.
Row 63: k1, p1 for 13 sts. Slip sts. just worked onto stitch holder, bind off the next 11 stitches knitwise; work across remaining sts. in established pattern: 13 stitches each side.

NECK AND SHOULDER SHAPING – LEFT SHOULDER
Note: As you look at the bib with the right side facing, the first shoulder worked will be the left side. All the decreases are made on right side or odd numbered rows.

Row 64: (wrong side) k1, p1, across row.

Neck decreases:
Row 65: Slip 1 knitwise, k1, psso; k1, p1, across row. (12 sts.)
Row 66: k1, p1, across row.
Row 67: Slip 1 knitwise, k1, psso; p1, k1, across row. (11 sts.)
Row 68: k1, p1, across row.

Shoulder decreases:
Row 69: k1, p1 across to last 2 sts, p2tog. (10 sts.)
Row 70: p1, k1, across row.
Row 71: k1, p1, across to last 2 sts., k2tog. (9 sts.)
Row 72: k1, p1, across row.
Row 73: k1, p1, across to last 2 sts., p2tog. (8 sts.)
Row 74: p1, k1, across row.
Row 75: k1, p1, across to last 2 sts., k2tog. (7 sts.)
Row 76: k1, p1, across row.
Row 77: k1, p1, across to last 2 sts., p2tog. (6 sts.)
Row 78: p1, k1, across row.
Row 79: k1, p1, across to last 2 sts., k2tog. (5 sts.)
Row 80: k1, p1, across row.
Row 81: Slip 1 knitwise, k1, psso; k1, k2 tog. (3 sts.)

For the crocheted ties, slip your crochet hook through the three stitches and draw your yarn through. Then work a chain for about 12 - 14 inches. The crocheted ties are not as stretchy as the knitted ones, so you might want to make these slightly longer. When you reach the desired length, work back on the chain by inserting your hook in the second chain stitch nearest the end and slip stitch in each chain until you are back to the beginning. Fasten the yarn securely and weave in the ends. I have a “mini-tutorial” for making the crocheted ties on my blog. http://downcloverlaine.blogspot.com/2010/05/ties-that-bind.html

For the knitted ties, slip these 3 sts. to a dpn work an I-cord for approximately 12 inches. Fasten off and run end down through middle of I-cord. Don't worry if the I-cords look a little wonky. A firm tug will usually straighten them out and after the bib is washed, you won't even notice! A good tutorial for making the I-cords can be found here: http://www.knittinghelp.com/videos/knitting-tips


NECK AND SHOULDER SHAPING – RIGHT SHOULDER
With wrong side facing, slip sts. from stitch holder to left needle and join yarn at neck edge. All the decreases are made on right side or odd numbered rows.

Row 64: (wrong side) k1, p1, across row.

Neck decreases:
Row 65: k1, p1, across to last 2 sts., p2tog. (12 sts.)
Row 66: p1, k1, across row.
Row 67: k1, p1, across to last 2 sts., k2tog. (11 sts.)
Row 68: k1, p1, across row.

Shoulder decreases:
Row 69: Slip 1 knitwise, k1, psso; k1, p1, across row. (10 sts.)
Row 70: k1, p1, across row.
Row 71: Slip 1 knitwise, k1, psso; p1, k1, across row. (9 sts.)
Row 72: k1, p1, across row.
Row 73: Slip 1 knitwise, k1, psso; k1, p1, across row. (8 sts.)
Row 74: k1, p1, across row.
Row 75: Slip 1 knitwise, k1, psso; p1, k1, across row. (7 sts.)
Row 76: k1, p1, across row.
Row 77: Slip 1 knitwise, k1, psso; k1, p1, across row. (6 sts.)
Row 78: k1, p1, across row.
Row 79: Slip 1 knitwise, k1, psso; p1, k1, across row. (5 sts.)
Row 80: k1, p1, across row.
Row 81: Slip 1 knitwise, k1, psso; k1; k2tog. (3 sts.)

Work tie to correspond with the one you worked for the other side.

Weave in ends.

Do I Smell Cheese? Cloth


Copyright 2010 by Elaine Fitzpatrick. Permission is granted to make and sell items from this pattern provided that credit is given to me as the designer. Permission is not granted to reproduce the actual pattern, or post it, or distribute it, without my express permission. Please respect my copyright and play nice!

Size: approximately 8" X 8 ¼ ".

Materials: One skein of worsted weight cotton in a solid color. The cloth pictured was done in Peaches & Crème in Silver Gray.

Needles: U.S. Size 6/4.0mm or 5/3.75mm Because this is a “picture” cloth, you want your fabric to be fairly dense so the design will pop out. If you are a loose knitter, then you might want to drop down a needle size.

Gauge: 4.5 sts. per inch, not critical

Abbreviations:
k = knit
p = purl
sts. = stitches

Pattern: Cast on 37 sts. (NOTE: Odd numbered rows are the right side and even numbered rows are the wrong side.)

Row 1: k1, p1, across row.
Row 2: k1, p1, across row.
Row 3: k1, p1, across row.
Row 4: k1, p1, across row.
Row 5: k1, p1, across row.
Row 6: k1, p1, across row.
Row 7: k1, p1, across row.
Row 8: k1, p1, across row.
Row 9: (right side) (k1, p1) x5; k1; p5; (k1, p1) x2; k1; p5; (k1, p1) x5; k1.
Row 10: k1, p1, across row.
Row 11: (k1, p1) x3; k4; p1; k5; p1; k3; p1; k5; p1; k4; (p1, k1) x3.
Row 12: (k1, p1) x2; k1; (p5, k1) x2; p3; (k1, p5) x2; k1; (p1, k1) x2.
Row 13: (k1, p1) x2; k7; p1; k3; p1; k5; p1; k3; p1; k7; (p1, k1) x2.
Row 14: (k1, p1) x2; k1; p6; k4; p7; k4; p6; k1; (p1, k1) x2.
Row 15: (k1, p1) x2; k7; p1; k13; p1; k7; (p1, k1) x2.
Row 16: (k1, p1) x2; k1; p6; k1; p13; k1; p6; k1; (p1, k1) x2.
Row 17: (k1, p1) x2; k8; p1; k11; p1; k1; p1; k6; (p1, k1) x2.
Row 18: (k1, p1) x2; k1; p4; k1; p3; k1; p9; k1; p8; k1; (p1, k1) x2.
Row 19: (k1, p1) x2; k10; p1; k7; p1; k4; p1; k5; (p1, k1) x2.
Row 20: (k1, p1) x2; k1; (p4, k1) x2; p7; k1; p9; k1; (p1, k1) x2.
Row 21: (k1, p1) x2; k11; p1; k5; p1; k6; p1; k4; (p1, k1) x2.
Row 22: (k1, p1) x2; k1; p3; k1; p6; k1; p5; k1; p10; k1; (p1, k1) x2.
Row 23: (k1, p1) x2; k12; p5; k7; p1; k4; (p1, k1) x2.
Row 24: (k1, p1) x2; k1; p3; k1; p6; k1; p5; k1; p10; k1; (p1, k1) x2.
Row 25: (k1, p1) x2; k10; p1; k7; p1; k5; p1; k4; (p1, k1) x2.
Row 26: (k1, p1) x2; k1; p3; k1; p4; k1; p9; k1; p8; k1; (p1, k1) x2.
Row 27: (k1, p1) x2; k8; p1; k4; p3; k4; p1; k3; p1; k4; (p1, k1) x2.
Row 28: (k1, p1) x2; k1; p3; k1; p2; k1; p4; k1; p3; k1; p4; k1; p6; k1; (p1, k1) x2.
Row 29: (k1, p1) x2; k7; p1; k3; p1; k5; p1; (k3, p1) x3; k1; p1; k1.
Row 30: (k1, p1) x3; k1; p4; k1; p13; k1; p6; k1; (p1, k1) x2.
Row 31: (k1, p1) x2; k7; p1; k13; p1; k4; p1; k2; (p1, k1) x2.
Row 32: (k1, p1) x3; k1; p4; (k1, p6) x3; k1; (p1, k1) x2.
Row 33: (k1, p1) x2; k6; p2; k5; p3; k5; p2; k3; p1; k2; (p1, k1) x2.
Row 34: (k1, p1) x2; k1; p4; k1; p2; k1; p11; k1; p2; k1; p4; k1; (p1, k1) x2.
Row 35: (k1, p1) x2; (k4, p1) x2; k9; (p1, k4) x2; (p1, k1) x2.
Row 36: (k1, p1) x2; k1; p3; k1; p4; k1; p2; k1; p3; k1; p2; k1; p4; k1; p3; k1; (p1, k1) x2.
Row 37: (k1, p1) x2; k3; p1; k5; p1; k9; p1; k5; p1; k3; (p1, k1) x2.
Row 38: (k1, p1) x2; k1; p2; k1; p5; k1; p9; k1; p5; k1; p2; k1; (p1, k1) x2.
Row 39: (k1, p1) x2; k3; p1; k5; p1; k9; p1; k5; p1; k3; (p1, k1) x2.
Row 40: (k1, p1) x2; k1; p2; k1; p6; k1; p7; k1; p6; k1; p2; k1; (p1, k1) x2.
Row 41: (k1, p1) x2; k3; p1; k6; p1; k7; p1; k6; p1; k3; (p1, k1) x2.
Row 42: (k1, p1) x2; k1; p2; k1; p6; k1; p7; k1; p6; k1; p2; k1; (p1, k1) x2.
Row 43: (k1, p1) x2; k3; p1; k6; p2; k5; p2; k6; p1; k3; (p1, k1) x2.
Row 44: (k1, p1) x2; k1; p2; k1; p6; k1; p1; k5; p1; k1; p6; k1; p2; k1; (p1, k1) x2.
Row 45: (k1, p1) x2; k4; p1; k5; p1; k7; p1; k5; p1; k4; (p1, k1) x2.
Row 46: (k1, p1) x2; k1; (p4, k1) x2; p7; (k1, p4) x2; k1; (p1, k1) x2.
Row 47: (k1, p1) x2; k6; p4; k9; p4; k6; (p1, k1) x2.
Row 48: (k1, p1) x2; k1; p27; k1; (p1, k1) x2.
Row 49: (k1, p1) x3; k25; (p1, k1) x3.
Row 50: (k1, p1) x3; k1; p23; k1; (p1, k1) x3.
Row 51: (k1, p1) x4; k21; (p1, k1) x4.
Row 52: k1, p1, across row.
Row 53: k1, p1, across row.
Row 54: k1, p1, across row.
Row 55: k1, p1, across row.
Row 56: k1, p1, across row.
Row 57: k1, p1, across row.
Row 58: k1, p1, across row.

Bind off in k1, p1, and weave in ends.

Tuesday, August 31, 2010

Here we go again!

Just thought I'd let you know that I'm doing another KAL for the Monthly Dishcloths group on Yahoo, starting tomorrow! I hope I remember. Having a KAL start in the middle of the week is throwing me off! I'd like to post the rows here as well, but that's not the agreement I made. I guess you'll just have to wait until it's over to get the pattern! This one will run for six days, then I get a month off and do the next one November 1st. Thanks again to all my wonderful test knitters! It gives me such a peaceful state of mind knowing that at least the directions are correct!