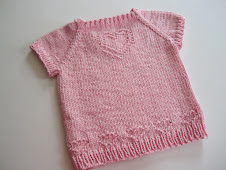
Updated patterns!

I'm in the process of updating my old patterns, particularly the bibs, to include charts. I'm rewriting some of the directions to make the patterns even easier and including alternative methods for beginning the bibs and for making the ties. Look for these patterns in the sidebar to see which ones have been added. It's a slow process, but eventually, they'll all be there!


Sunday, January 25, 2009

Calorimetry

Here is a really great knitting project if you're looking for something that is fun, quick, a little different and practical! My niece, Eliza, has beautiful hair and likes to wear it in a ponytail quite often. Unfortunately, (as you probably know) ponytails and hats aren't always compatible. I decided to try the famous Calorimetry pattern, an enlarged headband that buttons at the neckline. Here's Eliza modeling my version (without the ponytail!)

Many of the reviews on Ravelry said that the pattern tends to run big, so I scaled it down. Eliza is nine years old and her head measures 22 1/2" measuring from her nape and around the top of her head. The pattern says to cast on 120 stitches, but I did 88 stitches. The yarn is Cascade 220 (what else?!) and I used U.S. Size 8 needles for a gauge of 5 stitches to the inch.

The headband is made with short rows, but there is no wrapping so if you've never worked with short rows before, this would be a good project to get a feel for the technique. Because I wanted the hat to be scaled down a bit, I also did thirteen repeats of Row 5 instead of fifteen. I thought it also needed a little something to jazz it up so I decided to add the flowers to give it a real feminine touch! I couldn't find the type of flower I was looking for, so I just came up with my own version.

I don't doubt that someone else has already thought these flowers up, but in case you'd like to try them also, here's how I made them. First, I cast on three stitches and knitted an I-cord about 12 inches long and left a sizable tail.

Next I just ran the needle through the cord at about one inch intervals, so it's reminiscent of that ribbon candy you see at Christmas. I just kind of eyeballed it. I wanted five petals, but you could do as many as you like, depending on the length of the cord.

After you have run the needle through the cord, you just pull the tail to gather it up.

Ta da! One flower done. Just run the tails through the hat at the appropriate spot and attach them securely.

I added a french knot with a contrasting color to finish the flower off. The cord for the white flower was purposely a little shorter so that flower would be smaller. The light turquoise flower measures about 2 inches across. The white one is just slightly smaller.

Keep in mind though that the hat stretches, so don't place the flowers too far down, otherwise they'll end up by the ear.
I got to see Eliza play in one of her basketball games yesterday and I have to say that her headband was a huge hit with all the girls. Obviously, she didn't wear it during the game, but on the way out of the gymnasium, lots of parents were commenting on it. I think she was quite pleased with it too.
Oh and in case you're wondering, her team did win. Go Holy Cross!

Sunday, January 11, 2009

Mittens for Eliza

My little niece turns eight this month, so being the only girl in the family, I decided to test out a design I had rolling around in my head. I wanted to make her some snowflake mittens that were a little different. I had hoped to use one of the snowflake designs that Alli had already designed, but they were all too big for my purpose. So instead, I just decided to chart my own design. I like to use wool for mittens and I like to knit them fairly tight. This is just a basic mitten pattern that calls for double pointed needles (although I always use one long circular and magic loop). It's the same pattern that my grandmother used for years to make all of us mittens when we were little.
I've knit it so many times, that I almost don't even need to look at the pattern anymore. I just knitted the mittens and then did a duplicate stitch to add the snowflakes.

It was much easier to do the embroidery before doing the thumbs, as there was a hole to help maneuver the needle around. At first I considered trying to do them with intarsia, but the floats would just be too annoying. I also had added little white stitches around the perimeter of the flakes, but I decided they detracted from the design, so I eliminated them as well.

I also wanted to make the Owl Hat as Eliza loves animals. It's been made and posted on Ravelry a number of times, so it was helpful to read the reviews. The consensus was to move the owl motifs closer to the ribbing, which I did. I had my little grandson try it on for size, and I ended up making it longer. I may have to adjust the height anyway, but I'll have to wait until after the birthday to tell for sure!

It's been so dark and miserable here in the Northeast that I've had difficulty finding any decent light to photograph projects. Whenever the sun has shined, I've been cooped up at work!

Of course, I had to make mittens to go with the hat. There's a pattern called "Give a Hoot" that I wanted to use, but I couldn't get the gauge right, consequently, I ended up doing the mittens myself. They visited the frog pond more often than Kermit! I ripped them so many times, I almost gave up on them entirely. I just didn't like the way they looked. I'm still not entirely happy with them, but I know that Eliza will love them and that's all that counts. Right?

This is yarn that I had in my stash. It's by Sirdar and it's Denim Sport Aran. It was really nice to work with, but I wish that it had a little more wool content. I hope they'll be warm enough!

Of course the down side to this pattern is having to sew all those buttons! I had them left over from the days when I made and sold little English smocked dresses. They were the perfect size, but nine owls on the hat and a pair of mittens equals 22 buttons! Too much sewing when I'd rather be knitting! Happy Birthday Eliza and please try not to lose any of the mittens the first time you wear them!

Thursday, January 8, 2009

An Irish Hat

My Christmas knitting projects are all over and done. I managed to knit a hat for both my son and my daughter-in-law, a pair of socks for both Jack and Mickey, a pair of pants for little Marty, and three pairs of fingerless mitts. Of course, because I waited and did them all at the last minute, I didn't get good pictures of any of them. It was dark and rainy and I had to get them wrapped, so all that "work" is undocumented! (What did we do before Ravelry and blogs?) In any event, I decided to just knit something for myself. I like hats with brims and they are so hard to find. Most of them have to either be felted or they're so ugly, you wouldn't wear them anyway. Roxi of Lamb's Ear Farm posted a picture on the knitlist of this new hat she had designed. I immediately wrote and asked (okay, begged...) her to let me know when it was available as it was just what I wanted!

It's called the "Limerick Hat" and although it's not posted on the website yet, you can still order it. I used Cascade 220 Heather in Turtle Green. I decided it was time to really start using up my stash, so I'm trying not to buy any more yarn unless I absolutely need it. Yeah, right. I figure that resolution ought to last for at least another week or two!

The hat is knit in three steps. You knit the brim, which is folded, then you knit the cable band and seam it. Once that's done, you pick up the stitches along one side and knit the top. I altered the directions because it was too peaked for my taste. I omitted the plain knit rounds in between the decrease rounds for the last five rows. It lays flatter and looks more like a traditional hat. Finally, you have to sew the brim to the other side of the cabled band. It wasn't too difficult, but I also had to make the cable band a little shorter to fit the brim, otherwise, there would have been tons of ease to try to work in. It's not a fast knit, meaning that it took me two nights, instead of one, but it's relatively easy.

I would have posted a picture of me actually wearing the hat, but I didn't want to frighten any of you away, besides, my camera has been acting up and I didn't want to have it die altogether from the shock of seeing me actually in a picture!