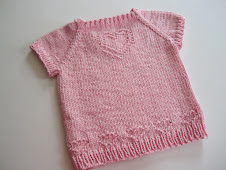
Well, August is fast approaching which means that my very first KAL will begin August first! I have to admit that I am pretty nervous about it. There are over 7,800 members and that's a lot of pressure! I keep worrying that they won't like the design or me! I'm also scheduled for two additional designs later in the year, but if this turns into a disaster, it may be the last you'll ever hear from me!!
For those of you who already belong to the Yahoo Monthly Dishcloths group, you'll get first crack at the design. For those of you who aren't a member, I'll be posting the complete pattern after the KAL is done, so you won't be left out. The KAL is for a cloth, but of course, there is a coordinating bib. Actually, as with all my designs, the bib came first!! I hope everyone will like it. It's just a fun, whimsical design that's perfect for Summer. The KAL will run for six days and, on the seventh, I'll post it here! Wish me luck!
Friday, July 30, 2010
Saturday, July 17, 2010
Hello...again
I thought maybe it was time to get re-acquainted with this blog. Knitting hasn't been at the top of my priorities lately. My daughter-in-law was recently diagnosed with cancer and I've been trying to help out where I can. I'm afraid that I haven't even had a pair of knitting needles in my hands for the past couple of weeks. I guess I thought it would be more productive to just worry! It seems to have worked though, because things are looking much better now! I want to thank you all for your nice messages and prayers. I've discovered who my real friends are.

I do want to mention that if you send me an email, be sure to put something in the subject line like "bibs" or "blog", so I know that it's not spam. I have received a couple of messages from people without any identifying information and if I don't know you, or don't have any information why you're contacting me, then I don't open it.

Before life got so crazy, I did knit up the cloth for the frog to match the bib I posted last time. As with the bib, this cloth isn't in the pdf files yet. I'm still waiting for my website to get up and running. Even with the new website, you'll still be able to just access it from here. I'm waiting for my son to get back from vacation when he promises he'll help me! I'm starting to have a backlog of patterns that need to get posted! ;o)

I do want to mention that if you send me an email, be sure to put something in the subject line like "bibs" or "blog", so I know that it's not spam. I have received a couple of messages from people without any identifying information and if I don't know you, or don't have any information why you're contacting me, then I don't open it.
On a parting note, here's what we woke up to this morning. The apartment house across the street had some uninvited guests for breakfast. This is what happens when you get drunk the night before, pass out, and forget to turn off your oven and stove.

Hop-a-Long Cloth

Copyright 2010 by Elaine Fitzpatrick. Permission is granted to make and sell items from this pattern provided that credit is given to me as the designer. Permission is not granted to reproduce the actual pattern, or post it, or distribute it, without my express permission. Please respect my copyright and play nice!
Size: approximately 7 ¼" X 7 ¾ ".
Materials: One skein of worsted weight cotton in a solid color. The cloth pictured was done in Peaches & Crème in Celery.
Needles: U.S. Size 5 or 6 Because this is a “picture” cloth, you want your fabric to be fairly dense so the design will pop out. If you are a loose knitter, then you might want to drop down a needle size.
Gauge: 4.5 sts. per inch, not critical.
Abbreviations:
k = knit
p = purl
sts. = stitches
Pattern: Cast on 37 sts. (NOTE: Odd numbered rows are the right side and even numbered rows are the wrong side.)
Rows 1 – 7: k1, p1 across row.
Row 8: (k1, p1) x2; k1; p9; k1; p3; k1; p4; k1; p3; k1; p2; k1; (p1, k1) x3.
Row 9: (k1, p1) x3; (k3, p1) x2; k4; p1; k3; p1; k10; (p1, k1) x2.
Row 10: (k1, p1) x2; k1; p9; k1; p3; k1; p4; k1; p3; k1; p4; k1; (p1, k1) x2.
Row 11: (k1, p1) x2; k5; p1; k13; p1; k7; (p1, k1) x3.
Row 12: (k1, p1) x3; k1; p3; k3; p13; k1; p5; k1; (p1, k1) x2.
Row 13: (k1, p1) x2; k6; p1; k18; p1; k3; (p1, k1) x2.
Row 14: (k1, p1) x2; k1; p3; k1; p16; k1; p6; k1; (p1, k1) x2.
Row 15: (k1, p1) x2; k7; p1; k15; p1; k5; (p1, k1) x2.
Row 16: (k1, p1) x2; k1; p5; k1; p13; k1; p7; k1; (p1, k1) x2.
Row 17: (k1, p1) x2; k8; p1; k12; p1; k7; (p1, k1) x2.
Row 18: (k1, p1) x2; k1; p6; k1; p11; k1; p8; k1; (p1, k1) x2.
Row 19: (k1, p1) x2; k9; p1; k1; p6; k3; p1; k8; (p1, k1) x2.
Row 20: (k1, p1) x2; k1; p7; k1; p2; k1; p6; k1; p9; k1; (p1, k1) x2.
Row 21: (k1, p1) x2; k9; p1; k8; p3; k8; (p1, k1) x2.
Row 22: (k1, p1) x2; k1; p6; k1; p12; k1; p7; k1; (p1, k1) x2.
Row 21: (k1, p1) x2; k8; p1; k13; p1; k6; (p1, k1) x2.
Row 24: (k1, p1) x2; k1; p4; (k1, p7) x2; k1; p6; k1; (p1, k1) x2.
Row 25: (k1, p1) x2; k7; p1; k15; p1; k5; (p1, k1) x2.
Row 26: (k1, p1) x2; k1; p4; k1; p11; k1; p3; k1; p6; k1; (p1, k1) x2.
Row 27: (k1, p1) x2; k7; p1; k15; p1; k5; (p1, k1) x2.
Row 28: (k1, p1) x2; k1; p5; k1; p14; k1; p6; k1; (p1, k1) x2.
Row 29: (k1, p1) x2; k7; p1; k14; p1; k6; (p1, k1) x2.
Row 30: (k1, p1) x2; k1; p5; k1; p13; k1; p7; k1; (p1, k1) x2.
Row 31: (k1, p1) x2; k9; p1; k11; p1; k7; (p1, k1) x2.
Row 32: (k1, p1) x2; k1; p6; k4; (p8, k1) x2; (p1, k1) x2.
Row 33: (k1, p1) x2; k9; p1; k7; p1; k4; p1; k6; (p1, k1) x2.
Row 34: (k1, p1) x2; k1; p5; k1; p4; k2; p2; k4; p9; k1; (p1, k1) x2.
Row 35: (k1, p1) x2; k9; p1; k4; p2; k1; p1; k4; p1; k6; (p1, k1) x2.
Row 36: (k1, p1) x2; k1; p5; k1; p2; k1; p1; k1; p2; k1; p4; k1; p8; k1; (p1, k1) x2.
Row 37: (k1, p1) x2; k3; p1; k5; p1; k4; p1; k2; p1; k4; p1; k6; (p1, k1) x2.
Row 38: (k1, p1) x2; k1; p6; k4; p3; k1; p2; k1; p1; k1; p8; k1; (p1, k1) x2.
Row 39: (k1, p1) x2; (k4; p1) x3; k14; (p1, k1) x2.
Row 40: (k1, p1) x2; k1; p14; k4; (p4, k1) x2; (p1, k1) x2.
Row 41: (k1, p1) x2; k4; p1; k1; p1; k22; (p1, k1) x2.
Row 42: (k1, p1) x2; k1; p20; k1; p3; k1; p2; k1; (p1, k1) x2.
Row 43: (k1, p1) x2; k2; p1; k3; p1; k1; p1; k20; (p1, k1) x2.
Row 44: (k1, p1) x2; k1; p20; k1; p1; k2; (p1, k1) x4.
Row 45: (k1, p1) x2; (k3, p1) x2; k21; (p1, k1) x2.
Row 46: (k1, p1) x2; k1; p20; k1; p1; k1; p4; k1; (p1, k1) x2.
Row 47: (k1, p1) x2; k4; p1; k2; p1; k21; (p1, k1) x2.
Row 48: (k1, p1) x2; k1; p20; k1; p2; k1; p3; k1; (p1, k1) x2.
Row 49: (k1, p1) x2; k5; p2; k22; (p1, k1) x2.
Row 50: (k1, p1) x2; k1; p27; k1; (p1, k1) x2.
Row 51: (k1, p1) x3; k25; (p1, k1) x3.
Rows 52 - 58: k1, p1 across row.
Bind off in k1, p1 and weave in ends.
Saturday, June 26, 2010
Micah's Frogs
First, I apologize for being away so long. Life has dealt our family a cruel blow, but we're surviving and life will go on. Needless to say, I haven't felt a lot like knitting lately, but it has bothered me that I haven't been posting as often as I'd like to.


OR
Traditional Beginning
Pattern: Cast on 15 sts.
Row 1: p1, k1 across row.
Row 2: Cast on 3 sts., k1, p1 across row. (18 sts.)
Row 3: Cast on 3 sts., k1, p1 across row. (21 sts.)
Row 4: Cast on 3 sts., p1, k1 across row. (24 sts.)
Row 5: Cast on 3 sts., p1, k1 across row. (27 sts.)
Row 6: Cast on 3 sts., k1, p1 across row. (30 sts.)
Row 7: Cast on 3 sts., k1, p1 across row. (33 sts.)
Row 8: Cast on 2 sts., k1, p1 across row. (35 sts.)
Row 9: Cast on 2 sts., k1, p1 across row. (37 sts.)
Row 10: k1, p1 across row.
Row 11: k1, p1 across row.
*Row 12: (k1, p1) x2; k1; p9; k1; p3; k1; p4; k1; p3; k1; p2; k1; (p1, k1) x3.
Row 13: (k1, p1) x3; (k3, p1) x2; k4; p1; k3; p1; k10; (p1, k1) x2.
Row 14: (k1, p1) x2; k1; p9; k1; p3; k1; p4; k1; p3; k1; p4; k1; (p1, k1) x2.
Row 15: (k1, p1) x2; k5; p1; k13; p1; k7; (p1, k1) x3.
Row 16: (k1, p1) x3; k1; p3; k3; p13; k1; p5; k1; (p1, k1) x2.
Row 17: (k1, p1) x2; k6; p1; k18; p1; k3; (p1, k1) x2.
Row 18: (k1, p1) x2; k1; p3; k1; p16; k1; p6; k1; (p1, k1) x2.
Row 19: (k1, p1) x2; k7; p1; k15; p1; k5; (p1, k1) x2.
Row 20: (k1, p1) x2; k1; p5; k1; p13; k1; p7; k1; (p1, k1) x2.
Row 21: (k1, p1) x2; k8; p1; k12; p1; k7; (p1, k1) x2.
Row 22: (k1, p1) x2; k1; p6; k1; p11; k1; p8; k1; (p1, k1) x2.
Row 23: (k1, p1) x2; k9; p1; k1; p6; k3; p1; k8; (p1, k1) x2.
Row 24: (k1, p1) x2; k1; p7; k1; p2; k1; p6; k1; p9; k1; (p1, k1) x2.
Row 25: (k1, p1) x2; k9; p1; k8; p3; k8; (p1, k1) x2.
Row 26: (k1, p1) x2; k1; p6; k1; p12; k1; p7; k1; (p1, k1) x2.
Row 27: (k1, p1) x2; k8; p1; k13; p1; k6; (p1, k1) x2.
Row 28: (k1, p1) x2; k1; p4; (k1, p7) x2; k1; p6; k1; (p1, k1) x2.
Row 29: (k1, p1) x2; k7; p1; k15; p1; k5; (p1, k1) x2.
Row 30: (k1, p1) x2; k1; p4; k1; p11; k1; p3; k1; p6; k1; (p1, k1) x2.
Row 31: (k1, p1) x2; k7; p1; k15; p1; k5; (p1, k1) x2.
Row 32: (k1, p1) x2; k1; p5; k1; p14; k1; p6; k1; (p1, k1) x2.
Row 33: (k1, p1) x2; k7; p1; k14; p1; k6; (p1, k1) x2.
Row 34: (k1, p1) x2; k1; p5; k1; p13; k1; p7; k1; (p1, k1) x2.
Row 35: (k1, p1) x2; k9; p1; k11; p1; k7; (p1, k1) x2.
Row 36: (k1, p1) x2; k1; p6; k4; (p8, k1) x2; (p1, k1) x2.
Row 37: (k1, p1) x2; k9; p1; k7; p1; k4; p1; k6; (p1, k1) x2.
Row 38: (k1, p1) x2; k1; p5; k1; p4; k2; p2; k4; p9; k1; (p1, k1) x2.
Row 39: (k1, p1) x2; k9; p1; k4; p2; k1; p1; k4; p1; k6; (p1, k1) x2.
Row 40: (k1, p1) x2; k1; p5; k1; p2; k1; p1; k1; p2; k1; p4; k1; p8; k1; (p1, k1) x2.
Row 41: (k1, p1) x2; k3; p1; k5; p1; k4; p1; k2; p1; k4; p1; k6; (p1, k1) x2.
Row 42: (k1, p1) x2; k1; p6; k4; p3; k1; p2; k1; p1; k1; p8; k1; (p1, k1) x2.
Row 43: (k1, p1) x2; (k4; p1) x3; k14; (p1, k1) x2.
Row 44: (k1, p1) x2; k1; p14; k4; (p4, k1) x2; (p1, k1) x2.
Row 45: (k1, p1) x2; k4; p1; k1; p1; k22; (p1, k1) x2.
Row 46: (k1, p1) x2; k1; p20; k1; p3; k1; p2; k1; (p1, k1) x2.
Row 47: (k1, p1) x2; k2; p1; k3; p1; k1; p1; k20; (p1, k1) x2.
Row 48: (k1, p1) x2; k1; p20; k1; p1; k2; (p1, k1) x4.
Row 49: (k1, p1) x2; (k3, p1) x2; k21; (p1, k1) x2.
Row 50: (k1, p1) x2; k1; p20; k1; p1; k1; p4; k1; (p1, k1) x2.
Row 51: (k1, p1) x2; k4; p1; k2; p1; k21; (p1, k1) x2.
Row 52: (k1, p1) x2; k1; p20; k1; p2; k1; p3; k1; (p1, k1) x2.
Row 53: (k1, p1) x2; k5; p2; k22; (p1, k1) x2.
Row 54: (k1, p1) x2; k1; p27; k1; (p1, k1) x2.
Row 55: (k1, p1) x3; k25; (p1, k1) x3.
Rows 56 – 62: k1, p1 across row.
Row 63: k1, p1 for 13 sts. Slip sts. just worked onto stitch holder, bind off the next 11 stitches knitwise; work across remaining sts. in established pattern: 13 stitches each side.
NECK AND SHOULDER SHAPING – LEFT SHOULDER
Note: As you look at the bib with the right side facing, the first shoulder worked will be the left side. All the decreases are made on right side or odd numbered rows.
Row 64: (wrong side) k1, p1 across row.
Neck decreases:
Row 65: Slip 1 knitwise, k1, psso; k1, p1 across row. (12 sts.)
Row 66: k1, p1 across row.
Row 67: Slip 1 knitwise, k1, psso; p1, k1 across row. (11 sts.)
Row 68: k1, p1 across row.
Shoulder decreases:
Row 69: k1, p1 across to last 2 sts, p2tog. (10 sts.)
Row 70: p1, k1 across row.
Row 71: k1, p1 across to last 2 sts., k2tog. (9 sts.)
Row 72: k1, p1 across row.
Row 73: k1, p1 across to last 2 sts., p2tog. (8 sts.)
Row 74: p1, k1 across row.
Row 75: k1, p1 across to last 2 sts., k2tog. (7 sts.)
Row 76: k1, p1 across row.
Row 77: k1, p1 across to last 2 sts., p2tog. (6 sts.)
Row 78: p1, k1 across row.
Row 79: k1, p1 across to last 2 sts., k2tog. (5 sts.)
Row 80: k1, p1 across row.
Row 81: Slip 1 knitwise, k1, psso; k1, p2 tog. (3 sts.)
For the crocheted ties, slip your crochet hook through the three stitches and draw your yarn through. Then work a chain for about 12 - 14 inches. The crocheted ties are not as stretchy as the knitted ones, so you might want to make these slightly longer. When you reach the desired length, work back on the chain by inserting your hook in the second chain stitch nearest the end and slip stitch in each chain until you are back to the beginning. Fasten the yarn securely and weave in the ends. I have a “mini-tutorial” for making the crocheted ties on my blog. http://downcloverlaine.blogspot.com/2010/05/ties-that-bind.html
For the knitted ties, slip these 3 sts. to a dpn work an I-cord for approximately 12 inches. Fasten off and run end down through middle of I-cord. Don't worry if the
I-cords look a little wonky. A firm tug will usually straighten them out and after the bib is washed, you won't even notice! A good tutorial for making the I-cords can be found here: http://www.knittinghelp.com/videos/knitting-tips
NECK AND SHOULDER SHAPING – RIGHT SHOULDER
With wrong side facing, slip sts. from stitch holder to left needle and join yarn at neck edge. All the decreases are made on right side or odd numbered rows.
Row 64: (wrong side) k1, p1 across row.
Neck decreases:
Row 65: k1, p1 across to last 2 sts., p2tog. (12 sts.)
Row 66: p1, k1 across row.
Row 67: k1, p1 across to last 2 sts., k2tog. (11 sts.)
Row 68: k1, p1 across row.
Shoulder decreases:
Row 69: Slip 1 knitwise, k1, psso; k1, p1 across row. (10 sts.)
Row 70: k1, p1 across row.
Row 71: Slip 1 knitwise, k1, psso; p1, k1 across row. (9 sts.)
Row 72: k1, p1 across row.
Row 73: Slip 1 knitwise, k1, psso; k1, p1 across row. (8 sts.)
Row 74: k1, p1 across row.
Row 75: Slip 1 knitwise, k1, psso; p1, k1 across row. (7 sts.)
Row 76: k1, p1 across row.
Row 77: Slip 1 knitwise, k1, psso; k1, p1 across row. (6 sts.)
Row 78: k1, p1 across row.
Row 79: Slip 1 knitwise, k1, psso; p1, k1 across row. (5 sts.)
Row 80: k1, p1 across row.
Row 81: Slip 1 knitwise, k1, psso; k1; p2tog. (3 sts.)
Work tie to correspond with the one you worked for the other side.
Weave in ends.
On a happier note, my grandson, Micah, recently turned 5. As I've told you before, he just loves frogs (shudder), so I thought it would be fun to knit him some frog mittens.

This is the Frog Mitts pattern from Morehouse Farm . They had a big sale on all of their patterns, so I couldn't resist this one, plus a "few" others. They also sell kits in addition to their patterns. The only drawback on these is the two holes for the eyes. I'm not so sure how practical it is to have two holes in your mittens! Still Micah seemed to like them and he insisted on wearing them home, even though it was close to 85 degrees!


I used Cascade 220 in Palm Green. A nice froggy green!
I also knit him a pair of froggy socks. Well, at least I tried to make them. I haven't ever used intarsia on socks before and after these, I doubt that I'll ever try it again! I started out using black and green, but after starting and ripping, or should I say "frogging" it three times, I ended up just ditching the black and starting over with the navy blue. I had a hard time getting a nice smooth cuff. I had much better luck with these, or so I thought. When Micah went to put them on, we could barely get them over his heel. There is hardly any stretch to the cuff, because of the intarsia. Duh, I should have realized that! On top of that, I discovered that his feet have grown significantly since the last pair of socks I made him!! Very inconsiderate of him, don't you think?


In any event, he wanted to wear them home as well. I bet it was fun trying to get them off his feet that night. I used Cascade Heritage for the navy and some left over bits of Knit Picks Stroll in "Canopy". I love that yarn! If you think you might like the chart, I'll post it. Just click on the picture to enlarge it.


I used size 2.75 mm needles and 52 stitches which gave me a repeat of four frogs.
After all these frog projects, I realized that I should probably add a frog bib to the mix as well (not for Micah, of course). I call this bib "Hop-A-Long" and I warn you that it has NOT BEEN TESTED. This time around, I decided that you can all be my test knitters, so if any of you decide to make it, please let me know if you find any errors. If you would prefer to make a dishcloth, you just need to knit seven rows of "k1, p1" and then begin the pattern with Row 12 and end with Row 62. Eventually, I'll knit up a cloth. There isn't a pdf for this one pattern. My webspace has run out of room. My son is working on getting me set up with a website, but until that's done, I'll just have to post the patterns here. So then, without further ado, here's
"Hop-A-Long":

Copyright 2010 by Elaine Fitzpatrick. Permission is granted to make and sell items from this pattern provided that credit is given to me as the designer. Permission is not granted to reproduce the actual pattern, or post it, or distribute it, without my express permission. Please respect my copyright and play nice!
Size: approximately 8" from neck edge to bottom and 7 ½" wide
Materials: One skein of worsted weight cotton in a solid color such as Peaches & Crème or Sugar ‘n Cream if you are using the bib for meals. If, on the other hand, you want to use it as a “drool” bib, I would recommend using a superwash wool. The cotton has a tendency to absorb the moisture, whereas the superwash wool will wick the moisture and keep baby nice and dry! Sample was done in Peaches & Crème Apple Green.
Needles: US 5/3.75 mm or 6/4.0mm You want the bib to be fairly dense, so if the fabric is too loose, just drop down a needle size.
2 double pointed needles US 5/3.75 mm for the knitted I-cord ties
or
Size G crochet hook for the crocheted ties
Gauge: 4.5 sts. per inch, not critical.
PATTERN NOTES
This pattern allows you to choose between two methods of beginning the bib. One uses short rows and the other, more traditional way, requires you to cast on stitches at the beginning of the first few rows of the pattern. There are also two methods for doing the ties. One has crocheted ties and the other method uses knitted I-cords. The crocheted ties are slightly thinner. If you do make the knitted ties, you can drop down a needle size when knitting the cords. I like to run a long tail down the center of the cord to finish it off. Be sure to use a straight needle and not one with a bent tip!
Abbreviations:
k = knit
p = purl
psso: pass slipped stitch over
k2tog.= knit 2 stitches together
p2tog.=purl 2 stitches together
sts. = stitches
dec. = decrease
dpn. = double pointed needle
Short Row Version
For this method, you don’t have to wrap stitches or pick up wraps. You just work the stitches to a point and turn your work around and start knitting in the opposite direction. I’ve written out every row for you and I’ve indicated how many stitches you should have remaining at the end of each row. If you lose your count, all you have to do is check on the number of stitches you have left on your needle and you’ll be right back on track. This technique results in a nice smooth edge.
Cast on 37 stitches
Row 1: k1, p1 for 26 sts.; turn (11 sts. unworked)
Row 2: Slip 1 knitwise; k1, p1 for 17 sts.; turn (8 sts. unworked)
Row 3: Slip 1 knitwise; p1, k1 for 20 sts.; turn (8 sts. unworked)
Row 4: Slip 1 knitwise; p1, k1 for 23 sts.; turn (5 sts. unworked)
Row 5: Slip 1 knitwise; k1, p1 for 26 sts.; turn (5 sts. unworked)
Row 6: Slip 1 knitwise; k1, p1 for 28 sts.; turn (3 sts. unworked)
Row 7: Slip 1 knitwise; k1, p1 for 30 sts.; turn (3 sts. unworked)
Row 8: Slip 1 knitwise; k1, p1 for 32 sts.; turn (1 sts. unworked)
Row 9: Slip 1 knitwise; k1, p1 for 34 sts.; turn (1 sts. unworked)
Row 10: Slip 1 knitwise; k1, p1 for 35 sts.
Row 11: k1, p1 across row.
Continue with *Row 12 of pattern.
OR
Traditional Beginning
Pattern: Cast on 15 sts.
Row 1: p1, k1 across row.
Row 2: Cast on 3 sts., k1, p1 across row. (18 sts.)
Row 3: Cast on 3 sts., k1, p1 across row. (21 sts.)
Row 4: Cast on 3 sts., p1, k1 across row. (24 sts.)
Row 5: Cast on 3 sts., p1, k1 across row. (27 sts.)
Row 6: Cast on 3 sts., k1, p1 across row. (30 sts.)
Row 7: Cast on 3 sts., k1, p1 across row. (33 sts.)
Row 8: Cast on 2 sts., k1, p1 across row. (35 sts.)
Row 9: Cast on 2 sts., k1, p1 across row. (37 sts.)
Row 10: k1, p1 across row.
Row 11: k1, p1 across row.
*Row 12: (k1, p1) x2; k1; p9; k1; p3; k1; p4; k1; p3; k1; p2; k1; (p1, k1) x3.
Row 13: (k1, p1) x3; (k3, p1) x2; k4; p1; k3; p1; k10; (p1, k1) x2.
Row 14: (k1, p1) x2; k1; p9; k1; p3; k1; p4; k1; p3; k1; p4; k1; (p1, k1) x2.
Row 15: (k1, p1) x2; k5; p1; k13; p1; k7; (p1, k1) x3.
Row 16: (k1, p1) x3; k1; p3; k3; p13; k1; p5; k1; (p1, k1) x2.
Row 17: (k1, p1) x2; k6; p1; k18; p1; k3; (p1, k1) x2.
Row 18: (k1, p1) x2; k1; p3; k1; p16; k1; p6; k1; (p1, k1) x2.
Row 19: (k1, p1) x2; k7; p1; k15; p1; k5; (p1, k1) x2.
Row 20: (k1, p1) x2; k1; p5; k1; p13; k1; p7; k1; (p1, k1) x2.
Row 21: (k1, p1) x2; k8; p1; k12; p1; k7; (p1, k1) x2.
Row 22: (k1, p1) x2; k1; p6; k1; p11; k1; p8; k1; (p1, k1) x2.
Row 23: (k1, p1) x2; k9; p1; k1; p6; k3; p1; k8; (p1, k1) x2.
Row 24: (k1, p1) x2; k1; p7; k1; p2; k1; p6; k1; p9; k1; (p1, k1) x2.
Row 25: (k1, p1) x2; k9; p1; k8; p3; k8; (p1, k1) x2.
Row 26: (k1, p1) x2; k1; p6; k1; p12; k1; p7; k1; (p1, k1) x2.
Row 27: (k1, p1) x2; k8; p1; k13; p1; k6; (p1, k1) x2.
Row 28: (k1, p1) x2; k1; p4; (k1, p7) x2; k1; p6; k1; (p1, k1) x2.
Row 29: (k1, p1) x2; k7; p1; k15; p1; k5; (p1, k1) x2.
Row 30: (k1, p1) x2; k1; p4; k1; p11; k1; p3; k1; p6; k1; (p1, k1) x2.
Row 31: (k1, p1) x2; k7; p1; k15; p1; k5; (p1, k1) x2.
Row 32: (k1, p1) x2; k1; p5; k1; p14; k1; p6; k1; (p1, k1) x2.
Row 33: (k1, p1) x2; k7; p1; k14; p1; k6; (p1, k1) x2.
Row 34: (k1, p1) x2; k1; p5; k1; p13; k1; p7; k1; (p1, k1) x2.
Row 35: (k1, p1) x2; k9; p1; k11; p1; k7; (p1, k1) x2.
Row 36: (k1, p1) x2; k1; p6; k4; (p8, k1) x2; (p1, k1) x2.
Row 37: (k1, p1) x2; k9; p1; k7; p1; k4; p1; k6; (p1, k1) x2.
Row 38: (k1, p1) x2; k1; p5; k1; p4; k2; p2; k4; p9; k1; (p1, k1) x2.
Row 39: (k1, p1) x2; k9; p1; k4; p2; k1; p1; k4; p1; k6; (p1, k1) x2.
Row 40: (k1, p1) x2; k1; p5; k1; p2; k1; p1; k1; p2; k1; p4; k1; p8; k1; (p1, k1) x2.
Row 41: (k1, p1) x2; k3; p1; k5; p1; k4; p1; k2; p1; k4; p1; k6; (p1, k1) x2.
Row 42: (k1, p1) x2; k1; p6; k4; p3; k1; p2; k1; p1; k1; p8; k1; (p1, k1) x2.
Row 43: (k1, p1) x2; (k4; p1) x3; k14; (p1, k1) x2.
Row 44: (k1, p1) x2; k1; p14; k4; (p4, k1) x2; (p1, k1) x2.
Row 45: (k1, p1) x2; k4; p1; k1; p1; k22; (p1, k1) x2.
Row 46: (k1, p1) x2; k1; p20; k1; p3; k1; p2; k1; (p1, k1) x2.
Row 47: (k1, p1) x2; k2; p1; k3; p1; k1; p1; k20; (p1, k1) x2.
Row 48: (k1, p1) x2; k1; p20; k1; p1; k2; (p1, k1) x4.
Row 49: (k1, p1) x2; (k3, p1) x2; k21; (p1, k1) x2.
Row 50: (k1, p1) x2; k1; p20; k1; p1; k1; p4; k1; (p1, k1) x2.
Row 51: (k1, p1) x2; k4; p1; k2; p1; k21; (p1, k1) x2.
Row 52: (k1, p1) x2; k1; p20; k1; p2; k1; p3; k1; (p1, k1) x2.
Row 53: (k1, p1) x2; k5; p2; k22; (p1, k1) x2.
Row 54: (k1, p1) x2; k1; p27; k1; (p1, k1) x2.
Row 55: (k1, p1) x3; k25; (p1, k1) x3.
Rows 56 – 62: k1, p1 across row.
Row 63: k1, p1 for 13 sts. Slip sts. just worked onto stitch holder, bind off the next 11 stitches knitwise; work across remaining sts. in established pattern: 13 stitches each side.
NECK AND SHOULDER SHAPING – LEFT SHOULDER
Note: As you look at the bib with the right side facing, the first shoulder worked will be the left side. All the decreases are made on right side or odd numbered rows.
Row 64: (wrong side) k1, p1 across row.
Neck decreases:
Row 65: Slip 1 knitwise, k1, psso; k1, p1 across row. (12 sts.)
Row 66: k1, p1 across row.
Row 67: Slip 1 knitwise, k1, psso; p1, k1 across row. (11 sts.)
Row 68: k1, p1 across row.
Shoulder decreases:
Row 69: k1, p1 across to last 2 sts, p2tog. (10 sts.)
Row 70: p1, k1 across row.
Row 71: k1, p1 across to last 2 sts., k2tog. (9 sts.)
Row 72: k1, p1 across row.
Row 73: k1, p1 across to last 2 sts., p2tog. (8 sts.)
Row 74: p1, k1 across row.
Row 75: k1, p1 across to last 2 sts., k2tog. (7 sts.)
Row 76: k1, p1 across row.
Row 77: k1, p1 across to last 2 sts., p2tog. (6 sts.)
Row 78: p1, k1 across row.
Row 79: k1, p1 across to last 2 sts., k2tog. (5 sts.)
Row 80: k1, p1 across row.
Row 81: Slip 1 knitwise, k1, psso; k1, p2 tog. (3 sts.)
For the crocheted ties, slip your crochet hook through the three stitches and draw your yarn through. Then work a chain for about 12 - 14 inches. The crocheted ties are not as stretchy as the knitted ones, so you might want to make these slightly longer. When you reach the desired length, work back on the chain by inserting your hook in the second chain stitch nearest the end and slip stitch in each chain until you are back to the beginning. Fasten the yarn securely and weave in the ends. I have a “mini-tutorial” for making the crocheted ties on my blog. http://downcloverlaine.blogspot.com/2010/05/ties-that-bind.html
For the knitted ties, slip these 3 sts. to a dpn work an I-cord for approximately 12 inches. Fasten off and run end down through middle of I-cord. Don't worry if the
I-cords look a little wonky. A firm tug will usually straighten them out and after the bib is washed, you won't even notice! A good tutorial for making the I-cords can be found here: http://www.knittinghelp.com/videos/knitting-tips
NECK AND SHOULDER SHAPING – RIGHT SHOULDER
With wrong side facing, slip sts. from stitch holder to left needle and join yarn at neck edge. All the decreases are made on right side or odd numbered rows.
Row 64: (wrong side) k1, p1 across row.
Neck decreases:
Row 65: k1, p1 across to last 2 sts., p2tog. (12 sts.)
Row 66: p1, k1 across row.
Row 67: k1, p1 across to last 2 sts., k2tog. (11 sts.)
Row 68: k1, p1 across row.
Shoulder decreases:
Row 69: Slip 1 knitwise, k1, psso; k1, p1 across row. (10 sts.)
Row 70: k1, p1 across row.
Row 71: Slip 1 knitwise, k1, psso; p1, k1 across row. (9 sts.)
Row 72: k1, p1 across row.
Row 73: Slip 1 knitwise, k1, psso; k1, p1 across row. (8 sts.)
Row 74: k1, p1 across row.
Row 75: Slip 1 knitwise, k1, psso; p1, k1 across row. (7 sts.)
Row 76: k1, p1 across row.
Row 77: Slip 1 knitwise, k1, psso; k1, p1 across row. (6 sts.)
Row 78: k1, p1 across row.
Row 79: Slip 1 knitwise, k1, psso; p1, k1 across row. (5 sts.)
Row 80: k1, p1 across row.
Row 81: Slip 1 knitwise, k1, psso; k1; p2tog. (3 sts.)
Work tie to correspond with the one you worked for the other side.
Weave in ends.
Friday, May 28, 2010
The Ties That Bind
Wow, I can't believe it's been so long since my last post! Where did the time go? Oh wait, I know. I've been burying my head in new patterns for the 2011 Dishcloth Calendar and another "special" project, neither of which I can really discuss..... yet! However, in the process of working on my special project, I've come up with an alternative way to make those tedious and boring bib ties. I know they can be a pain to make, but I just don't like to use buttons with bibs. I also think it's difficult to gauge the length of the band. Cotton shrinks and if the band isn't long enough, then you have a problem with a too tight neck. With the ties, you don't have to worry about any of that. My new way of making the ties is so much faster, however it does require a slight knowledge of crochet.

I'm the first to admit that I'm lousy with a crochet hook. I know the basic stitches, but I just never really took to it. That said, these new ties are really basic crochet. If you can make a chain, then you should be able to make them without a problem! The ties are only slightly thinner than the knit ones. Here then, is my little tutorial on how to make the crocheted ties.
First you want to take the three stitches that you would normally use for the knitted I-cords and insert your hook through the loops:

Draw your yarn through the three stitches and pull it tightly.


Now crochet an ordinary chain for about 12 inches.

When you've reached the desired length, you're going to put your hook in the second chain from the hook and draw the yarn through this stitch and the one on your hook. A slip stitch. Keep slipping the stitches all the way down the chain until you reach the bib where you began the tie.

Now you just need to cut the yarn, leaving enough to secure the end to the bib. Make sure it's nice and tight.


I actually make a knot on the back to make sure it's really secure and weave the tail in back and forth. Here's a picture of the backside (can you see my knot?):


When you're done, this is what the tie looks like:

And here it is compared to a knit tie:

As you can see, they are pretty close in size. The crocheted ties are so much faster and it makes the whole project just zip right along. From now on, any pattern that I post will include the directions for both the knitted ties as well as the crocheted ones. I hope you'll try it and let me know what you think!
Now, I have to get back to work on the calendar. I only needed to come up with two designs, but once I got started I had trouble stopping. My theory is anything worth doing, is worth over doing. Last count, I had eleven designs! It would be great if I could just post pictures and have all of you vote on which ones to include, but then there wouldn't be any element of surprise. All of the ones that don't make it into the calendar, will eventually end up here. Maybe I should do my own mystery knit-a-long?
Friday, April 30, 2010
Happy Arbor Day!
Happy Arbor Day! Here’s my latest offering. Okay, so I know it doesn’t exactly relate to Arbor Day, but, after all, owls do live in trees! That’s close enough, right? The bib was knit in Army Tan from Peaches & Crème. I really like this color knitted up. I wasn’t so sure I would, given the name, but it’s not too dark and not too light. Just right!! The cloth is also from Peaches & Crème in gold. I almost always use the P&C since I have so many cones of the yarn. Also, they supply all the pre-packs for the Dishcloth Calendar so I feel it’s only right to support them. Plus, I like it and that’s the most important reason of all!!


The pdfs are in the sidebar, but I’m also posting the patterns for those of you who have trouble with the downloads. Finally, go hug a tree, but first, please leave me a comment! I love hearing from you and also, it lets me know that someone is reading this!! You are reading this, right?
Whooo Loves Ya, Baby?

Copyright 2010 by Elaine Fitzpatrick. Permission is granted to make and sell items from this pattern provided that credit is given to me as the designer. Permission is not granted to reproduce the actual pattern, or post it, or distribute it, without my express permission. Please respect my copyright and play nice!
Materials: One skein of worsted weight cotton such as Peaches & Crème and Sugar ‘n Cream if you are using the bib for meals. If, on the other hand, you want to use it as a “drool” bib, I would recommend using a superwash wool. The cotton has a tendency to absorb the moisture, whereas the superwash wool will wick the moisture and keep baby nice and dry!
Sample was done in Peaches & Crème Army Tan.
Needles: US 6/4mm
2 double pointed needles for the I-cords
Gauge: 4.5 sts. per inch, not critical You want the bib to be fairly dense, so if the fabric is too loose, just drop down a needle size.
PATTERN NOTES
This pattern allows you to choose between two methods of beginning the bib. One uses short rows and the other, more traditional way, requires you to cast on stitches at the beginning of the first few rows of the pattern. The ties are done by making I-cords. It’s helpful, but not necessary, to drop down a needle size when knitting the cords. I like to run a long tail down the center of the cord to finish it off. Be sure to use a straight needle and not one with a bent tip!
Short Row Version
For this method, you don’t have to wrap stitches or pick up wraps. You just work the stitches to a point and turn your work around and start knitting in the opposite direction. I’ve written out every row for you and I’ve indicated how many stitches you should have remaining at the end of each row. If you lose your count, all you have to do is check on the number of stitches you have left on your needle and you’ll be right back on track. This technique results in a nice smooth edge.
Pattern: Cast on 39 sts.
Row 1: (right side) k1, p1 for 26 sts., turn. You will have 13 stitches that are unworked.
Row 2: (wrong side) slip 1 st. knitwise, k1, p1 for 15 sts.; turn. (10 unworked stitches)
Row 3: Slip 1 st. knitwise; p1, k1 for 18 sts.; turn. (10 unworked stitches)
Row 4: Slip 1 st. knitwise; p1, k1 for 21 sts.; turn. (7 unworked stitches)
Row 5: Slip 1 st. knitwise; k1, p1 for 24 sts.; turn. (7 unworked stitches)
Row 6: Slip 1 st. knitwise; k1, p1 for 26 sts.; turn. (5 unworked stitches)
Row 7: Slip 1 st. knitwise; k1, p1 for 28 sts.; turn. (5 unworked stitches)
Row 8: Slip 1 st. knitwise; k1, p1 for 30 sts.; turn. (3 unworked stitches)
Row 9: Slip 1 st. knitwise; k1, p1 for 32 sts.; turn. (3 unworked stitches)
Row 10: Slip 1 st. knitwise; k1, p1 for 34 sts.; turn. (1 unworked stitch)
Row 11: Slip 1 st. knitwise; k1, p1 for 36 sts.; turn. (1 unworked stitch)
Row 12: Slip 1 st. knitwise; k1, p1 to end.
Row 13: k1, p1 across row.
Continue in pattern beginning with Row 12 below*.
Traditional Version
This method requires you to cast on stitches at the beginning of each row. I prefer to use the knitted cast on method, but you can use any method that you like. Just remember to keep the stitches tight.
Pattern: Cast on 13 stitches.
Row 1: p1, k1 across.
Row 2: Cast on 3 sts. at beginning of row, k1, p1 across row. (16 sts.)
Row 3: Cast on 3 sts. at beginning of row, k1, p1 across row. (19 sts.)
Row 4: Cast on 3 sts. at beginning of row, p1, k1 across row. (22 sts.)
Row 5: Cast on 3 sts. at beginning of row, p1, k1 across row. (25 sts.)
Row 6: Cast on 3 sts. at beginning of row, k1, p1 across row. (28 sts.)
Row 7: Cast on 3 sts. at beginning of row, k1, p1 across row. (31 sts.)
Row 8: Cast on 2 sts. at beginning of row, k1, p1 across row. (33 sts.)
Row 9: Cast on 2 sts. at beginning of row, k1, p1 across row. (35 sts.)
Row 10: Cast on 2 sts. at beginning of row, k1, p1 across row. (37 sts.)
Row 11: Cast on 2 sts. at beginning of row, k1, p1 across row. (39 sts.)
*Row 12: (wrong side) k1, p1 across row.
Row 13: (right side) (k1, p1) x2; k1; p29; (k1, p1) x2; k1.
Row 14: (k1, p1) x2; k1; p5; (k1, p1)x2; k1; p6; (k1, p1)x2; k1; p8; (k1, p1) x2; k1.
Row 15: (k1, p1)x2; k8; (p1, k1)x3; p1; k4; (p1, k1)x3; p1; k5; (p1, k1)x2.
Row 16: (k1, p1) x2; k1; p4; (k1, p1)x3; k6; (p1, k1)x3; p7; (k1, p1) x2; k1.
Row 17: (k1, p1)x2; k8; p1; k5; p1; k4; (p1, k5)x2; (p1, k1)x2.
Row 18: (k1, p1) x2; k1; p5; (k1, p4)x3; k1; p8; (k1, p1) x2; k1.
Row 19: (k1, p1)x2; k10; p4; k6; p4; k3; p1; k3; (p1, k1)x2.
Row 20: (k1, p1) x2; k1; p2; k2; p3; k1; p4; k1; p5; k1; p10; (k1, p1) x2; k1.
Row 21: (k1, p1)x2; k10; p1; k2; p1; k9; (p1, k1)x2; p1; k3; (p1, k1)x2.
Row 22: (k1, p1) x2; k1; p2; k1; p2; k2; p2; k1; (p4, k1)x2; p9; (k1, p1) x2; k1.
Row 23: (k1, p1)x2; k9; p1; k7; p1; k5; p1; k2; p1; k1; p1; k2; (p1, k1)x2.
Row 24: (k1, p1) x3; k1; p2; k1; p2; k1; p8; k1; p3; k2; p7; (k1, p1) x2; k1.
Row 25: (k1, p1)x2; k7; (p1, k1)x2; p1; k7; (p1, k2)x4; (p1, k1)x2.
Row 26: (k1, p1) x3; k1; p3; k1; p1; k1; p6; k1; p5; k1; p2; k1; p5; (k1, p1) x2; k1.
Row 27: (k1, p1)x2; k5; p1; k3; p1; k12; p1; k5; p1; k2; (p1, k1)x2.
Row 28: (k1, p1) x3; k1; p6; k1; p3; k1; p4; k1; p2; k1; p3; k1; p4; (k1, p1) x2; k1.
Row 29: (k1, p1)x2; (k4, p1)x2; k9; p1; k1; p1; k6; p1; k2; (p1, k1)x2.
Row 30: (k1, p1) x2; k1; p2; k1; p5; k1; p6; k1; p3; k1; p5; k1; p3; (k1, p1) x2; k1.
Row 31: (k1, p1)x2; k3; p1; k6; p1; k5; p1; k4; p1; k5; p1; k3; (p1, k1)x2.
Row 32: (k1, p1) x2; k1; p3; k1; p4; k1; p1; k1; p5; k1; p2; k1; p3; (k1, p2)x2; (k1, p1) x2; k1.
Row 33: (k1, p1)x2; k3; p1;k1; p1; k4; p1; k10; (p1, k4)x2; (p1, k1)x2.
Row 34: (k1, p1) x2; k1; p4; k1; p3; k1; p1; k6; p2; k1; p6; k2; p2; (k1, p1) x2; k1.
Row 35: (k1, p1)x2; k4; p1; k6; p1; k1; p1; k6; p2; k2; p1; k6; (p1, k1)x2.
Row 36: (k1, p1) x2; k1; p6; k2; p5; k1; p3; k2; p6; k1; p3; (k1, p1) x2; k1.
Row 37: (k1, p1)x2; k3; p1; k6; p2; k4; p1; k5; p1; k8; (p1, k1)x2.
Row 38: (k1, p1) x2; k1; p7; k3; p2; k2; p1; k3; p2; k1; p3; k1; p1; k1; p2; (k1, p1) x2; k1.
Row 39: (k1, p1)x2; k3; p2; k3; p1; k2; (p1, k3)x3; p1; k7; (p1, k1)x2.
Row 40: (k1, p1) x2; k1; (p5, k1)x2; p1; k1; p5; k1; p1; k1; p2; k1; p4; (k1, p1) x2; k1.
Row 41: (k1, p1)x2; k4; (p1, k2)x2; p1; k5; p1; k1; p1; k5; p1; k6; (p1, k1)x2.
Row 42: (k1, p1) x2; k1; p5; (k1, p2)x2; k1; p1; (k1, p2)x2; k1; p3; k1; p1; k1; p3; (k1, p1) x2; k1.
Row 43: (k1, p1)x2; k4; p2; k4; p1; k5; p1; k1; p1; k5; p1; k6; (p1, k1)x2.
Row 44: (k1, p1) x2; k1; (p5, k1)x2; p1; (k1, p5)x2; k1; p3; (k1, p1) x2; k1.
Row 45: (k1, p1)x2; k11; (p1, k3)x3; p1; k7; (p1, k1)x2.
Row 46: (k1, p1) x2; k1; p7; k3; p5; k3; p11; (k1, p1) x2; k1.
Row 47: (k1, p1)x2; k12; p1; k9; p3; k6; (p1, k1)x2.
Row 48: (k1, p1) x2; k1; p3; k2; p3; k1; p7; k3; p10; (k1, p1) x2; k1.
Row 49: (k1, p1)x2; k10; p1; k3; p1; k5; p1; k6; p1; k3; (p1, k1)x2.
Row 50: (k1, p1) x2; k1; p3; k1; p4; k1; p1; k5; p1; k1; p3; k1; p8; (k1, p1) x2; k1.
Row 51: (k1, p1)x2; k8; p1; k3; p1; k9; p4; k5; (p1, k1)x2.
Row 52: (k1, p1) x2; k1; p18; k3; p8; (k1, p1) x2; k1.
Row 53: (k1, p1) x3; k27; (p1, k1) x3.
Row 54: (k1, p1) x3; k1; p25; (k1, p1) x3; k1.
Row 55: (k1, p1) x4; k23; (p1, k1) x4.
Row 56: (k1, p1) x4; k1; p21; (k1, p1) x4; k1.
Rows 57 and 58: (k1, p1) x5; k19; (p1, k1) x5.
Rows 59 - 64: k1, p1 across row.
Row 65: k1, p1 for 14 sts. Slip sts. just worked onto stitch holder, bind off the next 11 stitches knitwise; work across remaining sts. in established pattern: 14 stitches each side.
NECK AND SHOULDER SHAPING – LEFT SHOULDER
Note: As you look at the bib with RS facing, the first shoulder worked will be the left side. All the decreases are made on right side rows.
Row 66: k1, p1 across row.
Note: As you look at the bib with RS facing, the first shoulder worked will be the left side. All the decreases are made on right side rows.
Row 66: k1, p1 across row.
Neck decreases:
Row 67: (right side) Slip 1 knitwise, k1, psso; p1, k1 across row. (13 sts.)
Row 68: k1, p1 across row.
Row 69: Slip 1 knitwise, k1, psso; k1, p1 across row. (12 sts.)
Row 70: k1, p1 across row.
Row 71: Slip 1 knitwise, k1, psso; p1, k1 across row. (11 sts.)
Row 72: k1, p1 across row.
Shoulder decreases:
Row 73: (right side) k1, p1 across to last 2 sts, p2tog. (10 sts.)
Row 74: p1, k1 across row.
Row 75: k1, p1 across to last 2 sts., k2tog. (9 sts.)
Row 76: k1, p1 across row.
Row 77: k1, p1 across to last 2 sts., p2tog. (8 sts.)
Row 78: p1, k1 across row.
Row 79: k1, p1 across to last 2 sts., k2tog. (7 sts.)
Row 80: k1, p1 across row.
Row 81: k1, p1 across to last 2 sts., p2tog. (6 sts.)
Row 82: p1, k1 across row.
Row 83: k1, p1 across to last 2 sts., k2tog. (5 sts.)
Row 84: k1, p1 across row.
Row 85: Slip 1 knitwise, k1, psso; k1, k2 tog. (3 sts.)
Slip these 3 sts. to a dpn and work an I-cord for approximately 12 inches. Fasten off and run end down through middle of I-cord. Don't worry if the I-cords look a little wonky. A firm tug will usually straighten them out and after the bib is washed, you won't even notice! A good tutorial for making the I-cords can be found here:
http://www.knittinghelp.com/videos/knitting-tips
NECK AND SHOULDER SHAPING – RIGHT SHOULDER
With wrong side facing, slip sts. from stitch holder to left needle and join yarn at neck edge.
Row 66: (wrong side) p1, k1 across row.
With wrong side facing, slip sts. from stitch holder to left needle and join yarn at neck edge.
Row 66: (wrong side) p1, k1 across row.
Neck decreases:
All the decreases are made on right side rows.
Row 67: k1, p1 across to last 2 sts., k2tog. (13 sts.)
Row 68: k1, p1 across row.
Row 69: k1, p1 across to last 2 sts., p2tog. (12 sts.)
Row 70: p1, k1 across row.
Row 71: k1, p1 across to last 2 sts., k2tog. (11 sts.)
Row 72: k1, p1 across row.
Shoulder decreases:
Row 73: Slip 1 knitwise, k1, psso; k1, p1 across row. (10 sts.)
Row 74: k1, p1 across row.
Row 75: Slip 1 knitwise, k1, psso; p1, k1 across row. (9 sts.)
Row 76: k1, p1 across row.
Row 77: Slip 1 knitwise, k1, psso; k1, p1 across row. (8 sts.)
Row 78: k1, p1 across row.
Row 79: Slip 1 knitwise, k1, psso; p1, k1 across row. (7 sts.)
Row 80: k1, p1 across row.
Row 81: Slip 1 knitwise, k1, psso; k1, p1 across row. (6 sts.)
Row 82: k1, p1 across row.
Row 83: Slip 1 knitwise, k1, psso; p1, k1 across row. (5 sts.)
Row 84: k1, p1 across row.
Row 85: Slip 1 knitwise, k1, psso; k1; k2tog. (3 sts.)
Slip these 3 sts. to a dpn and work an I-cord for approximately 12 inches. Fasten off and run end down through middle of I-cord as before.
Weave in ends.
Subscribe to:
Posts (Atom)